Lemongrass

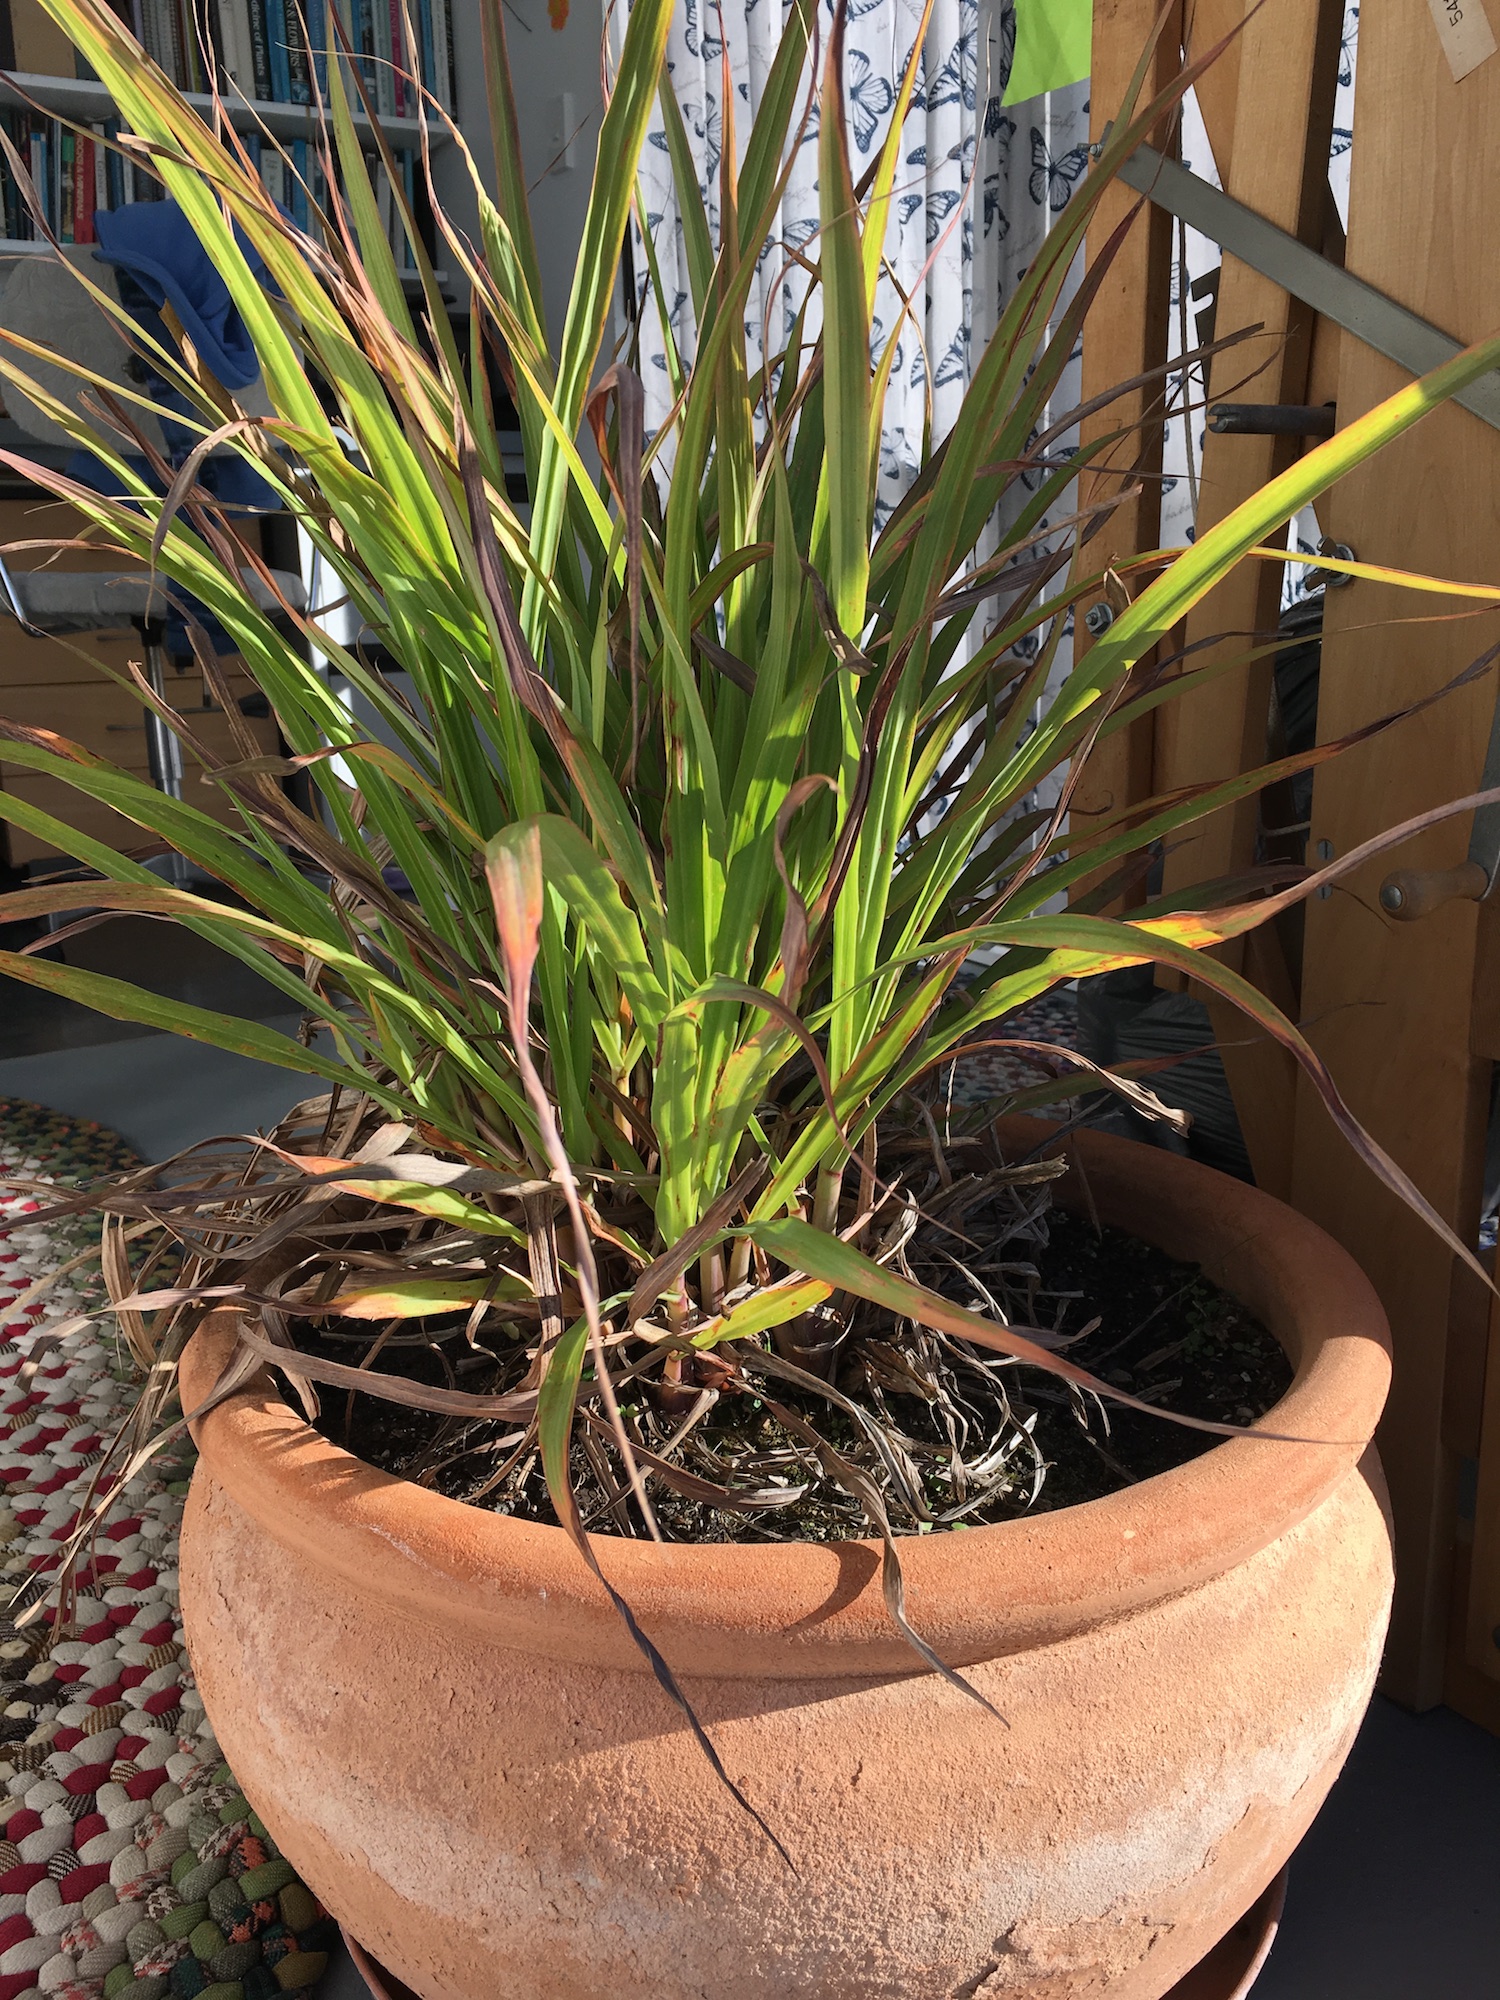
I brought the lemongrass (Cymbopogon citratus) indoors last weekend. It’s not supposed to be able to handle freezing temperatures. It does, but it doesn’t like them. The one winter I left it outside, it died back to just a few well-protected shoots in the centre of the plant.

Thankfully, it doesn’t need much protection. My office is unheated at night, but it provides enough protection to keep the lemongrass alive.

We don’t use much lemongrass. Though its lemony flavour is nice, it doesn’t have the sourness of real lemon, so I find lemongrass tea too sweet.

However, we do occasionally use it in stir fries, marinades and salad dressings, where it imparts its lemony flavour alongside other, more sour ingredients. We were first introduced to its use in salad dressings by Yotam Ottolenghi’s wonderful cookbook Plenty (which I’ve mentioned before). His sweet winter slaw recipe calls for the following dressing:

100ml lime juice
1 lemongrass stalk, chopped
3 Tbsp maple syrup
2 Tbsp toasted sesame oil
1 tsp soy sauce
1/4 tsp chilli flakes
4 tbsp light olive oil or sunflower oil

Place all ingredients except the oil in a saucepan and boil for 5-10 minutes until thick and syrupy. Allow to cool, then strain. Whisk in the oil and toss with your salad.

It’s an excellent way to use lemongrass, pairing with salty, oily, and sour ingredients that enhance its flavour. It’s worth giving up office space to the plant, just for this dressing.

Pear Tart

Several kilos of beautiful pears in the house inspired pear tart for dessert last night. Taking inspiration from a few recipes, I came up with the following. It was lovely!

Peel, core, and slice 4 large pears.

Combine and sprinkle over the pears:
1/4c flour
3 Tbsp sugar
3/4 tsp cinnamon
1/4 tsp nutmeg
1/8 tsp cloves

Toss pears with flour mixture until evenly coated.

Make your favourite pie crust recipe—enough for a one-crust pie. Roll the crust into a large round (about 15 in/38 cm in diameter) and place on a baking sheet.

Arrange the pear slices in the middle of the crust, leaving about 5 cm/2 in around the edge. Bonus points if you can make a pretty spiral, but it tastes the same either way. Pour any remaining juice over the top, then fold the edge of the crust up and over the pears.

Bake at 190ÂşC (375ÂşF) for about 40 minutes. Allow to cool at least 15 minutes before cutting.

**Pears are incredibly sweet, and though this tart was divine, I like a little tartness in my tarts. Next time I will add some grated lemon peel to the filling or serve it with yogurt.

Homemade Pasta

2 1/4 cups of flour
3 eggs

It is one of the simplest ingredient lists ever. It is the recipe for homemade pasta.

I don’t make pasta often–maybe once every two months or so–but it’s always a pleasure to eat homemade noodles. With such a short ingredient list, I should probably make them more often, but there’s more to a recipe than the ingredients.

There’s a learning curve to pasta. It takes patience to master the feel of the dough–to know when to add just a little more flour, or when to stop kneading it and start rolling it thin.

I used to stress about making pasta. I found it quite frustrating. It was always too wet or too dry. It ripped when I tried rolling it through the pasta machine, or it wouldn’t go through at all. It became too elastic and chewy. It seemed everything that could go wrong did.

I’ve learned a lot about handling the dough through making mistakes. But I think the most important thing I’ve learned is to have patience–with the dough and with myself.

The dough will behave badly. I must accept that and have patience, working with it until it starts to feel just right, and not getting upset when it takes longer than I want it to.

Once I think the dough is perfect, it will prove me wrong, and tear as it is rolled thin. I must accept this, set the offending dough aside to rest for a few minutes, then try again.

Even the most perfect noodles will clump, or break, or otherwise be marred before they are cooked. I must accept this, and cook them anyway–they’re going to be chewed up and swallowed, and no one but me will pay attention to whether they have been broken beforehand.

Making homemade noodles is a luxury and a privilege. Not everyone has the opportunity to do so. I must accept this, appreciate this, recognise that I do this because I enjoy it, not because I have to. Even if it goes badly, it need not cause me stress. Even if I struggle with it, the end result will be delicious.

Coloured Cornmeal

Our beautiful Painted Mountain corn is fully dry. Today my son and I ground enough to make corn chips.

It ground quite nicely in our coffee grinder (well-cleaned, first). I was a bit disappointed to note that the interior of the kernels was white. The resulting cornmeal wasn’t the rosy colour I’d hoped. Instead it was flecked with colour–confetti cornmeal.

The resulting corn chips were delicious. Right out of the oven, the taste was reminiscent of popcorn, but fully cooled, the popcorn flavour diminished.

Were they better than corn chips made with commercial cornmeal? The jury is out. I think we need to do side-by-side taste testing to determine which is better. I suspect my family will be thrilled to oblige. We might just have to have a chip and dip party (ooh, this gets better and better).

Am I happy I planted Painted Mountain corn? Absolutely! My son is grinding the next batch of meal as I type, and we’re looking forward to trying it in all manner of dishes. Maybe the taste will be no different from commercial cornmeal, but we will know it came from our garden, and that will make it taste twice as good.

Haloumi

I admit, it’s taken me eleven years of cheese-making to finally decide to make haloumi. I needed a cheese that would keep, but didn’t require several days of salting/turning/etc. Haloumi met that description.

I’d never made it because the processing time (for a proper, cultured haloumi) is so long and, frankly, the result is quite like paneer, which I can whip up in no time.

From a 7.00 am start, I finally put the finished cheese in the fridge at 3.45 pm. Hours of stirring, pressing, simmering, and salting.

We enjoyed some of it this evening, fried and served over a lovely warm salad of lentils and quinoa. The salad included salted lemons (which I blogged about back in September last year) which were just the right flavour with the cheese, pulses and quinoa.

A side of baked pumpkin slices rounded out the meal to perfection.

Truly delicious.

But will I make haloumi again? Maybe.

Rich in Mushrooms

I come to the computer under the delightful glow of my third meal of wild mushrooms in the past two days. As I mentioned a few days ago, the recent deluge has brought all the fungi out to play.

Agaricus arvensis and Boletus edulis are this week’s two wild additions to our meals. Their rich, earthy flavours have topped burgers and adorned home made pasta (because how can you possibly serve such wonderful mushrooms on store-bought pasta?)

There’s no doubt I love these wild mushrooms for their flavours, but I also appreciate them for their provenance. There’s something satisfying and primal about foraging for dinner. And it becomes even more satisfying when you consider these mushrooms can retail for $40/lb ($88/kg) in the US, if you can get them at all.

I smile to think that the dinner we’ve just eaten might have easily cost $30 to $40 a plate in a restaurant. But with wild-picked mushrooms, vegetables from the garden, and home made pasta (made with eggs from our own chickens), we spent well under $1 per person (and we all had seconds, and there are leftovers for tomorrow’s lunch). It’s no wonder we feel far wealthier than we actually are.

Indeed, you’d be hard-pressed to buy such a meal at any price, with vegetables just minutes out of the garden, eggs laid today, and obscene quantities of gourmet mushrooms. I almost feel sorry for rich people. All they have is money.


Apple Ring Pancakes

My husband mentioned he’d seen apple ring pancakes on the internet the other day, so I had to try them. I’m sorry I can’t attribute this idea to someone in particular, because I never actually saw the page. It’s a great idea, though.

To make mine, I started with a double batch of my usual World Famous Pancake Recipe, and added a teaspoon of cinnamon and half a teaspoon of cloves to the batter. You want a thick batter, to cling to the apples.

I peeled, cored, and sliced into rings four apples.

To make the pancakes, I dipped each apple ring into the batter and laid it on the hot skillet. My skillet was too hot at first, and I was having trouble getting them cooked through without burning on the outside–they’re thicker than normal pancakes. But even the dark ones were delicious.

Fun to make and fun to eat. I’ll definitely be making these again.

Apple Season

This year’s apple harvest was small, but unlike last year’s, it ripened on the tree instead of being blown off before it was ready, so the quality is good, even if the volume isn’t.

Truthfully, I’m thankful there aren’t too many apples to deal with. We’ve run out of canning jars and freezer space, so I’m not sure what I’d do with them if I had more.

So I’ve been considering how to process the fruits to encourage us to eat a lot of apples.

Naturally, apple pie is near the top of my list. Last year, with vast quantities of apples, I came across a particularly nice apple pie recipe that allows you to pack more fruit into a pie by pre-cooking the apples slightly. The recipe indicated it was a good way to avoid the empty space between fruit and upper crust that’s so common in apple pie, but I took it as an invitation to add more apples. And who could resist a thick, dense apple pie? Maybe with a little whipped cream?

Here’s the recipe, paraphrased from the 1997 edition of Joy of Cooking:

Make your favourite pie crust–enough for a double crust pie.

Roll out half the dough and fit it into a 9-inch (23 cm) pie pan. Roll out the other half of the dough. Refrigerate both until you’re ready to use them.

Peel, core and slice 3 pounds (about 1.5 kg) of apples. The recipe says you want 7 cups of slices–go for 8 cups.

Heat 3 tablespoons (40 g) unsalted butter in a wide skillet until sizzling. Add the apples and toss until glazed with butter. Reduce the heat to medium, cover, and cook, stirring frequently, until the apples are soft on the outside, but still slightly crunchy (5-7 minutes).

Stir in 3/4 cup of sugar, 1/2 tsp ground cinnamon, and 1/8 tsp salt.

Increase the heat to high and cook until the juices become thick and syrupy (about 3 minutes). Spread the apples on a baking sheet to cool to room temperature.

When cool, pour the apples into the bottom crust, add the top crust, cut steam vents, and bake 40-50 minutes at 425°F (220°C). Cool completely before serving.

Flying Saucers in the Garden!

I’ve mentioned these wee beauties before, but they deserve their own post. This is my third year planting extraterrestrials in the garden. Flying Saucers is an unusually shaped variety of scallopini (aka patty pan squash), developed in 2000. Its exaggerated ribbing gives it a spiky appearance. I’m not sure it’s particularly UFO-shaped, but it is bizarre-looking.

Like all scallopini, Flying Saucers has a lovely, nutty flavour and a firm texture. It does well in stir-fries, soups, pasta–anywhere you would use zucchini.

The ribs are most dramatic on young fruits, so pick them small (5cm/2in diameter), for maximum visual effect. If you pick them small enough, you can cut them in ’rounds’ that look like stars. I’ve also seen them used to great visual effect cut in half, hollowed out, and stuffed, creating beautiful star-like stuffed squash.

The seed catalogues say they are more green, less yellow when nighttime temperatures are high. Our nights are always chilly, so I don’t know if that’s true–mine have just a touch of green on the ends.

Flying Saucers is my scallopini of choice, since I discovered it. How could I resist such a brilliant squash?

Summer Soups and Stews

One of the nicest things about the end of summer are those autumnal days that make me crave hearty soups and stews–dishes I haven’t particularly wanted to eat in the heat of summer.

To have a chill in the air, but still have a garden bursting with summer vegetables means we can make wonderful warming dishes with the very best of summer flavours.

We’re into our third day of rain, with temperatures hovering around 11°C (52°F), and enjoying the possibilities the weather has offered.

First up was a beautiful tomato soup, made with a king’s ransom of fresh, garden-ripened tomatoes, and handfuls of fresh herbs. It was amazing for dinner and made a wonderful warming lunch the following day, too.

Tonight it was black beans from this year’s harvest, cooked with more fresh tomatoes and herbs, accompanied by corn bread and our own melons.

It makes me look forward to more rainy days to come!