Garden Planning

gardenplanning1
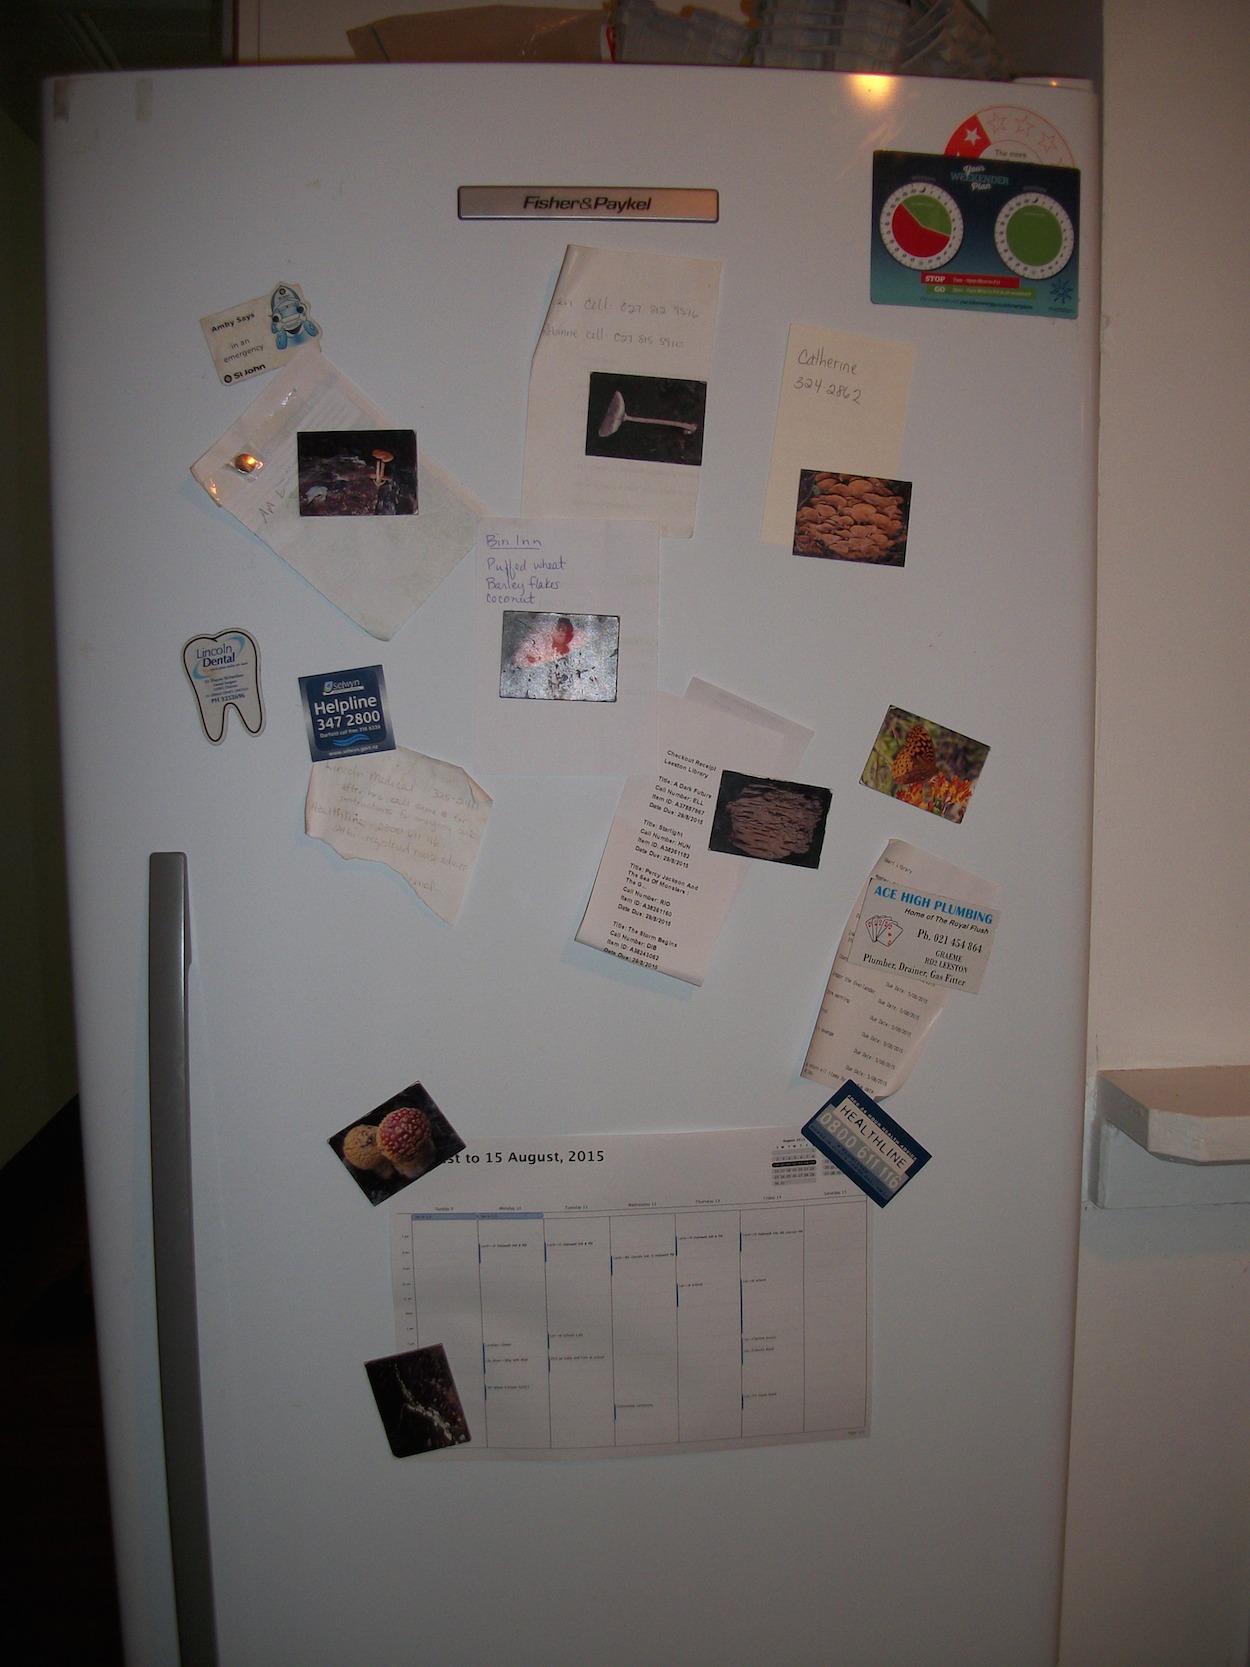
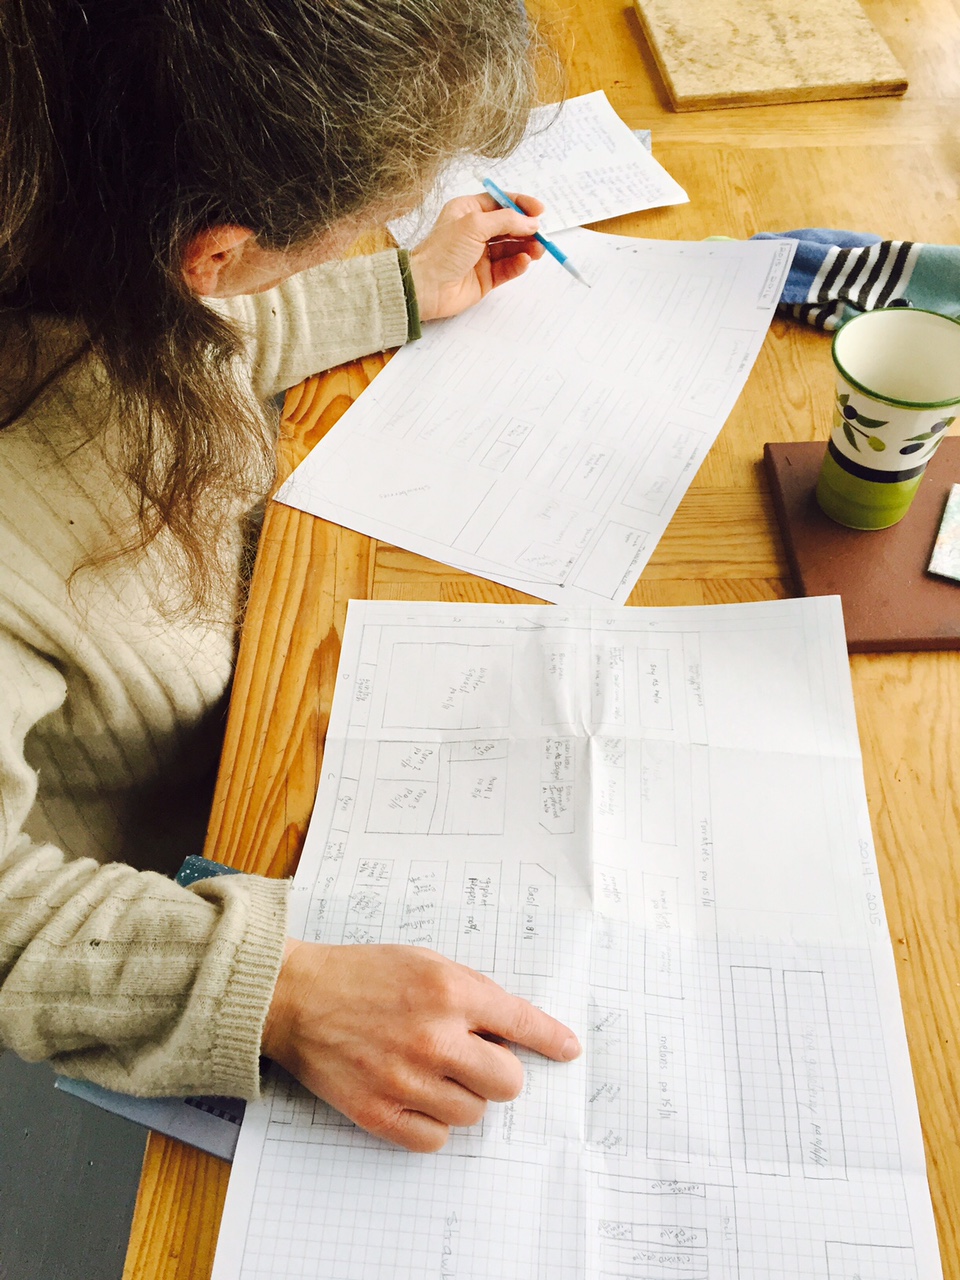
Part of my late-winter garden work is planning the coming summer’s vegetable garden. It’s a job I take seriously, because it affects my work for the entire year.

The vegetable garden (minus the greenhouse) covers about 410 square metres (4400 sq ft). It is divided into 28 beds, separated by narrow paths, with a broad path running up the middle between the gates on either end.

During the winter, the chickens run in about two thirds of the garden, controlling weeds and pests, and the remaining third is devoted to winter crops.

In planning the new crops, I need to take into account when the winter crops will be over, when I’ll have to remove the chickens from the garden for the year, and what was in each bed the year before.

I also need to take into account wind, irrigation patterns, available support structures, and growth patterns. For example, corn always goes near the edges, because the irrigator can’t throw water over the mature stalks—anything on the other side of the corn dries up. Corn is also a great wind block, and I can use it to protect more delicate plants from the vicious nor’west winds. Peas and tomatoes usually go on the edges of the garden, which are bounded by deer fencing they can be tied to for support. Melons like tall plants on their south side to block any cool southerly winds.

My goal is to have every inch of the garden covered with food plants for the entirety of the growing season. For example, the early spinach will be bolting by the time the tomatoes are ready to plant out, so they will share a bed. Chopped spinach stalks will form the mulch for the newly planted tomatoes. The garlic will be harvested before the pumpkins get large, so they can be planted in adjacent beds, and the pumpkins trained into the garlic bed once it is empty. Plants with a single harvest date, like dry beans, are planted in adjacent beds, and packed in so that the plants can spill into the paths, because I won’t need to walk down them frequently for picking.

It takes several hours (and usually a cup of coffee, and a scone if I can get it) to plan the garden to my satisfaction. There are often small changes as I go, but once the plan is in place, it guides my entire spring.

I can’t prepare 410 square metres of garden all at once, but with the plan in hand, I can prepare the beds in the right order so that each one is ready when the crop is ready to go in it. The plan allows me to ignore waist-high weeds in one bed while I focus on another, knowing that all the beds will eventually be prepared and planted. It makes my springtime as stress free as possible, and gives me time to stress about the weather instead!

Cinnamon-filled Scones

Lucky I managed a photo before they were all eaten!

Lucky I managed a photo before they were all eaten!

These are arguably the family’s favourite breakfast scone. They take longer to make and to bake than my usual scones, so I make them up the night before and put them in the fridge. In the morning, all I have to do is toss them in the oven. Though I haven’t tried it, the oat/whole wheat dough would go great with a jam filling, too!

Filling:

1/3 cup brown sugar

1 ½ tsp cinnamon

1 Tbsp all-purpose flour

3 Tbsp (40 g) very soft butter (almost, but not quite melted)

Stir together the above ingredients until they form a spreadable paste. Set aside.

Dough:

1 cup oat flour *

1 cup whole wheat flour

1 cup all-purpose flour

ÂĽ cup brown sugar

1 Tbsp baking powder

½ tsp salt

1 ½ tsp cinnamon

½ cup (125 g) cold butter

1 egg

1 cup milk **

1 tsp vanilla

Mix the flours, sugar, baking powder, salt and cinnamon in a large bowl. Cut in the butter with a pastry knife until it resembles coarse crumbs.

Whisk together the egg, milk, and vanilla. Add this mixture to the dry ingredients, and mix just until the dough comes together.

Divide the dough in half. Knead each half gently, then pat each into a 9-inch round. Place one round into a lightly greased 9-inch round baking pan. Spread the filling on top. Place the second round of dough on top of the filling and press gently to remove air pockets.

Cut the scones into 12 wedges, and bake at 375°F (190°C) for 40 minutes, until brown and firm in the centre. Allow to cool 5-10 minutes before removing from the pan.

Eat immediately…or someone else will beat you to them!

* You can make your own oat flour by grinding rolled oats in a food processor for about 30 seconds.

** For Cinnamon/Pumpkin scones, use Âľ cup of cooked, mashed pumpkin and ÂĽ cup milk. If the pumpkin is dry, you may need to add a little more milk.

And They’re Off!

100_3569 smHurrah! The gardening season has begun!

Though it was cold and rainy today, I began planting the early (onions, peas, spinach, lettuce, brassicas) and the slow-growing (peppers and eggplants) crops in trays today.

Now, my office/craft room also becomes a greenhouse. For the next three months it will house a growing array of seedlings that need a little extra warmth overnight.

For several years I started my seeds on top of an old electric blanket in the shed. It worked fine at keeping the seeds warm, but I had difficulty keeping the rats and birds from digging up the seeds and eating them.

Then I discovered that the blanket was getting wet in spite of the plastic I employed to protect it. I decided that, rather than risk burning down the shed or electrocuting myself with a decidedly off-label use of an electric blanket, I should move my plants.

The office has proven a wonderful greenhouse. The seedlings sprout quickly and without fail, and the large sliding glass doors let in plenty of sunlight. And there are no rats or birds to contend with.

The only downside is the humid atmosphere in the office for the spring months. What is good for plants isn’t exactly the best for people or office supplies!

Maybe someday I’ll have a heated greenhouse. Until then, I’ll have to make do with an office full of plants.

Klim Diplomacy

Kitchensm

All the kitchen you need for making ricotta!

I ran across this lovely article about unofficial Peace Corps cookbooks, and it brought a smile to my face.

There was no Panama Peace Corps cookbook when my husband and I were there, but there were plenty of recipes shared in the Peace Corps newsletter. I still have a few of them—ragged pieces of paper torn from the newsletter, smelling ever so faintly of mould.

The best Peace Corps recipe ever was for ricotta cheese made with powdered milk.

Fresh milk was impossible to come by in our village, as there was no electricity, and hence no refrigeration. Dairy of any sort just wasn’t part of the diet. But you could buy cans of powdered milk (marketed by Borden as Klim…the most uncreative name ever).

Today, with my goat milk, I am quite precise with temperature when I make ricotta, but the Peace Corps recipe was written for the Volunteer cooking over a three-rock fire with nothing more than a pot and a spoon.

The recipe went something like this:

Mix up two litres of milk from powder.

Heat to just below a boil.

Add ÂĽ cup of vinegar.

Skim off the cheese curds as they form.

This little recipe made surprisingly good ricotta, even from powdered milk. With it, we managed lasagne, pizza, and all manner of other cheesy treats over our little fire. It was a delightful break from unending days of rice and yuca.

Excited by our ability to make foods from home, we shared our pizza with the neighbours.

They thought it was disgusting.

But we all laughed and enjoyed the chance to talk about and compare our different cultures and cuisines.

One of the goals of Peace Corps is to foster understanding and exchange between cultures. Food is an important part of that exchange for all Peace Corps Volunteers. Even when the various parties can’t agree on what tastes good, food opens dialogue, it makes people smile, it is a common language.

Perhaps the world would be a more peaceful place if we all tried a little Klim diplomacy.

Fridge Magnets

100_3570 sm“Amby the Ambulance says dial 111 in an emergency!”

“Lincoln Dental—Where great smiles are made!”

“Healthline—24 hour free health advice!”

“Ace High Plumbing—Home of the royal flush!”

The front of the refrigerator is plastered with magnets from various businesses and organisations. The magnets hold up the critical documents that form the command centre of the house:

  • This week’s calendar, showing who is taking which bus to and from school, who has band practice when, and who is out of town or needs extra money for a school field trip.
  • Library check-out receipts so we know when we have to return the latest clutch of books.
  • A running grocery list which I add to as I finish off things in the kitchen.
  • Emergency phone numbers.

Move to the side of the fridge, and you leave the rational, logical command centre and enter the twilight zone of fridge magnet poetry. With two whole sets of fridge magnet words, and a house full of…um…creative people…you never know what you might see there.


“Together they must beat the monkeys

Who eat their friends

These windy sunny days

Still my head aches from the blow”


“Want

Quick

Are

You

Juice

Girl

Man”


“Want

Drive

Need

Lust

Or

Reveal”


If I had to analyse the family on the basis of our fridge magnets, I would say we are a well-organised bunch of lunatics!

Seasons of Garlic

15 heads of garlic, all in one pint jar!

15 heads of garlic, all in one pint jar!

The garlic I planted on the winter solstice has taken advantage of the recent rain. It is now 5cm above ground, and looking great!

Of course, when the garlic in the garden starts sprouting, so does the garlic stored in the shed. And once it starts sprouting, its flavour goes off. The goats will still eat it (they seem to love garlic, and the local breeders feed it to them to help fend off intestinal parasites), but it’s not very tasty to the human palate.

So it’s about this time of year when we switch to using the garlic we dried at harvest time. The thin slices grind well in a mortar and pestle, and are easy to use. Though they aren’t as good as fresh garlic, they’re much better than sprouted garlic, because they were dried at peak freshness.

We’ll use this dry garlic until we can start harvesting the first immature new heads around Christmas. But as spring comes on, and the winter-planted leeks and the spring onions begin to be harvested, we naturally start using more of these fresh members of the onion family and less garlic. There will almost certainly be dry garlic left when the new heads start coming in. But that’s okay—the goats like dry garlic, too!

Space Salad

Simple to grow at home. Not so simple in space.

Simple to grow at home. Not so simple in space.

Astronauts on the International Space Station made history today—they were the first people to eat lettuce grown in space. Red romaine, I understand. With a little balsamic vinegar.

It took years to work out how to do it. Things gardeners take for granted like gravity, 24 hour day cycles, water, and air, are a challenge when growing vegetables in space.

So, why is it important that astronauts can eat fresh lettuce? As of yet, we’ve found nothing edible beyond our own planet. If humans are ever to spend significant time in space, we’ll need to know how to produce food wherever we are, not just for logistical reasons, but who would want to eat those nasty pre-packaged astronaut meals for years on end?

This is another example of people taking their crops with them wherever they go, as I discussed two months ago in Eating Native?

Which, of course, makes me think of how some of the foods introduced to New Zealand have become weeds and pests, damaging the native life forms. Will there someday be weeds in space? Let’s hope we’ve learned a thing or two about avoiding introducing pests before we get to that point.

It Ain’t Over ‘Til the Magpie Sings

Photo: Eric Weiss

Photo: Eric Weiss

We’ve had more than our fair share of beautiful warm winter days this year. Though we’ve had some very cold nights, the days have been sunny, and we’ve gotten only a fraction of the rain we normally do over winter.

So you could have been forgiven for thinking, back in July, that winter was over. In fact, my daughter argued that it was spring a month ago.

I knew better. Winter would assert itself again.

It did so this past weekend, with icy winds bringing sleet, snow and rain. We huddled by the fire, venturing outdoors only to take extra food to the animals and split more firewood.

But in between icy squalls, at 4:00 am two days ago, I heard it—the certain sign that winter is on its way out.

A magpie.

Magpies are noisy all year long, but when spring is almost upon us, their noise changes. They start their wardle-oodle-ardling at four in the morning, and carry on until the sun rises. They feel what we know only because of the calendar—spring is just around the corner.

When the magpies start calling, I get restless. I wake when they do, and their call urges me out of bed.

Wardle-oodle-ardle!

Get up! Get up! Get ready!

            But it’s dark and raining!

Wardle-oodle-ardle!

Get up! Get up! Get ready!

            But it’s cold! Can’t I stay in bed?

Wardle-oodle-ardle!

Get up! Get up! Get ready!

Wardle-oodle-ardle!

Get up! Get up! Get ready!

Spring is coming!

Vandalizing the Cookbooks

100_3564I was taught never to write in books.

In high school when I was reading the classics for English class, the comments scribbled in the margins by previous students irritated me.

I even hesitated writing my name inside the front cover of books.

I still don’t generally write in books, but when it comes to cookbooks, I’ve realized that writing in them is necessary.

100_3566How else will I remember if a recipe is worth making again?

How else will I remember that this scone recipe is too wet, and requires an extra ÂĽ cup of flour, or that that cake recipe is better with half the sugar than called for? Or that the pumpkin pie recipe in the Mennonite Community Cookbook is much better than the one in Fanny Farmer?

100_3562My cookbooks are full of my scribbles in the margins, my temperature and weight conversions for American recipes that don’t provide the metric counterparts. The notes help me improve a recipe every time I make it, and remember what I’ve done when I’ve finally perfected a recipe.

Soft Pretzels

100_3556 smHaving grown up in central Pennsylvania, I consider pretzels their own food group.

So it was a great disappointment to discover that there are NO pretzels in New Zealand. Oh, you can get small bags of expensive, imported pretzels, but the variety and quality are very poor.

And soft pretzels—the pinnacle of pretzel evolution—are nonexistent.

Thankfully, soft pretzels are easy and fun to make!

I make soft pretzels from a light whole wheat bread dough—any relatively light dough will work fine.

Once your dough has finished its first rise, divide it into 100g (3.5 oz) pieces. Roll each piece into a long snake, then twist into a pretzel shape and place on a well-greased baking sheet (You can make other shapes, but keep them compact or they will break apart when handled). Cover and let them rise until about doubled in bulk.

Now comes the part that turns them into pretzels.

Bring to a boil a mixture of 4 cups of water and 5 tsp baking soda (I use a large pot and need to double this amount to get a reasonable depth of water). Drop the pretzels carefully into the water (you may only be able to put 1 or 2 into the water at a time—my big pot fits 3) and allow them to boil for about 1 minute, until they float to the surface (I gently turn them over once they’ve reached the surface so that both sides boil relatively evenly). With a large slotted spoon, take them out and place them back on the greased baking sheets.

Sprinkle with coarse salt and bake at 230°C (450°F) for 12 minutes or until nicely browned.

Eat them hot, slathered in mild mustard!