Crunchy Granola Bars

I’ve been tinkering for years with granola bar recipes, and have never come up with one that is crunchy and robust enough to take on a long hike.

granola bar

But I may have just managed it …

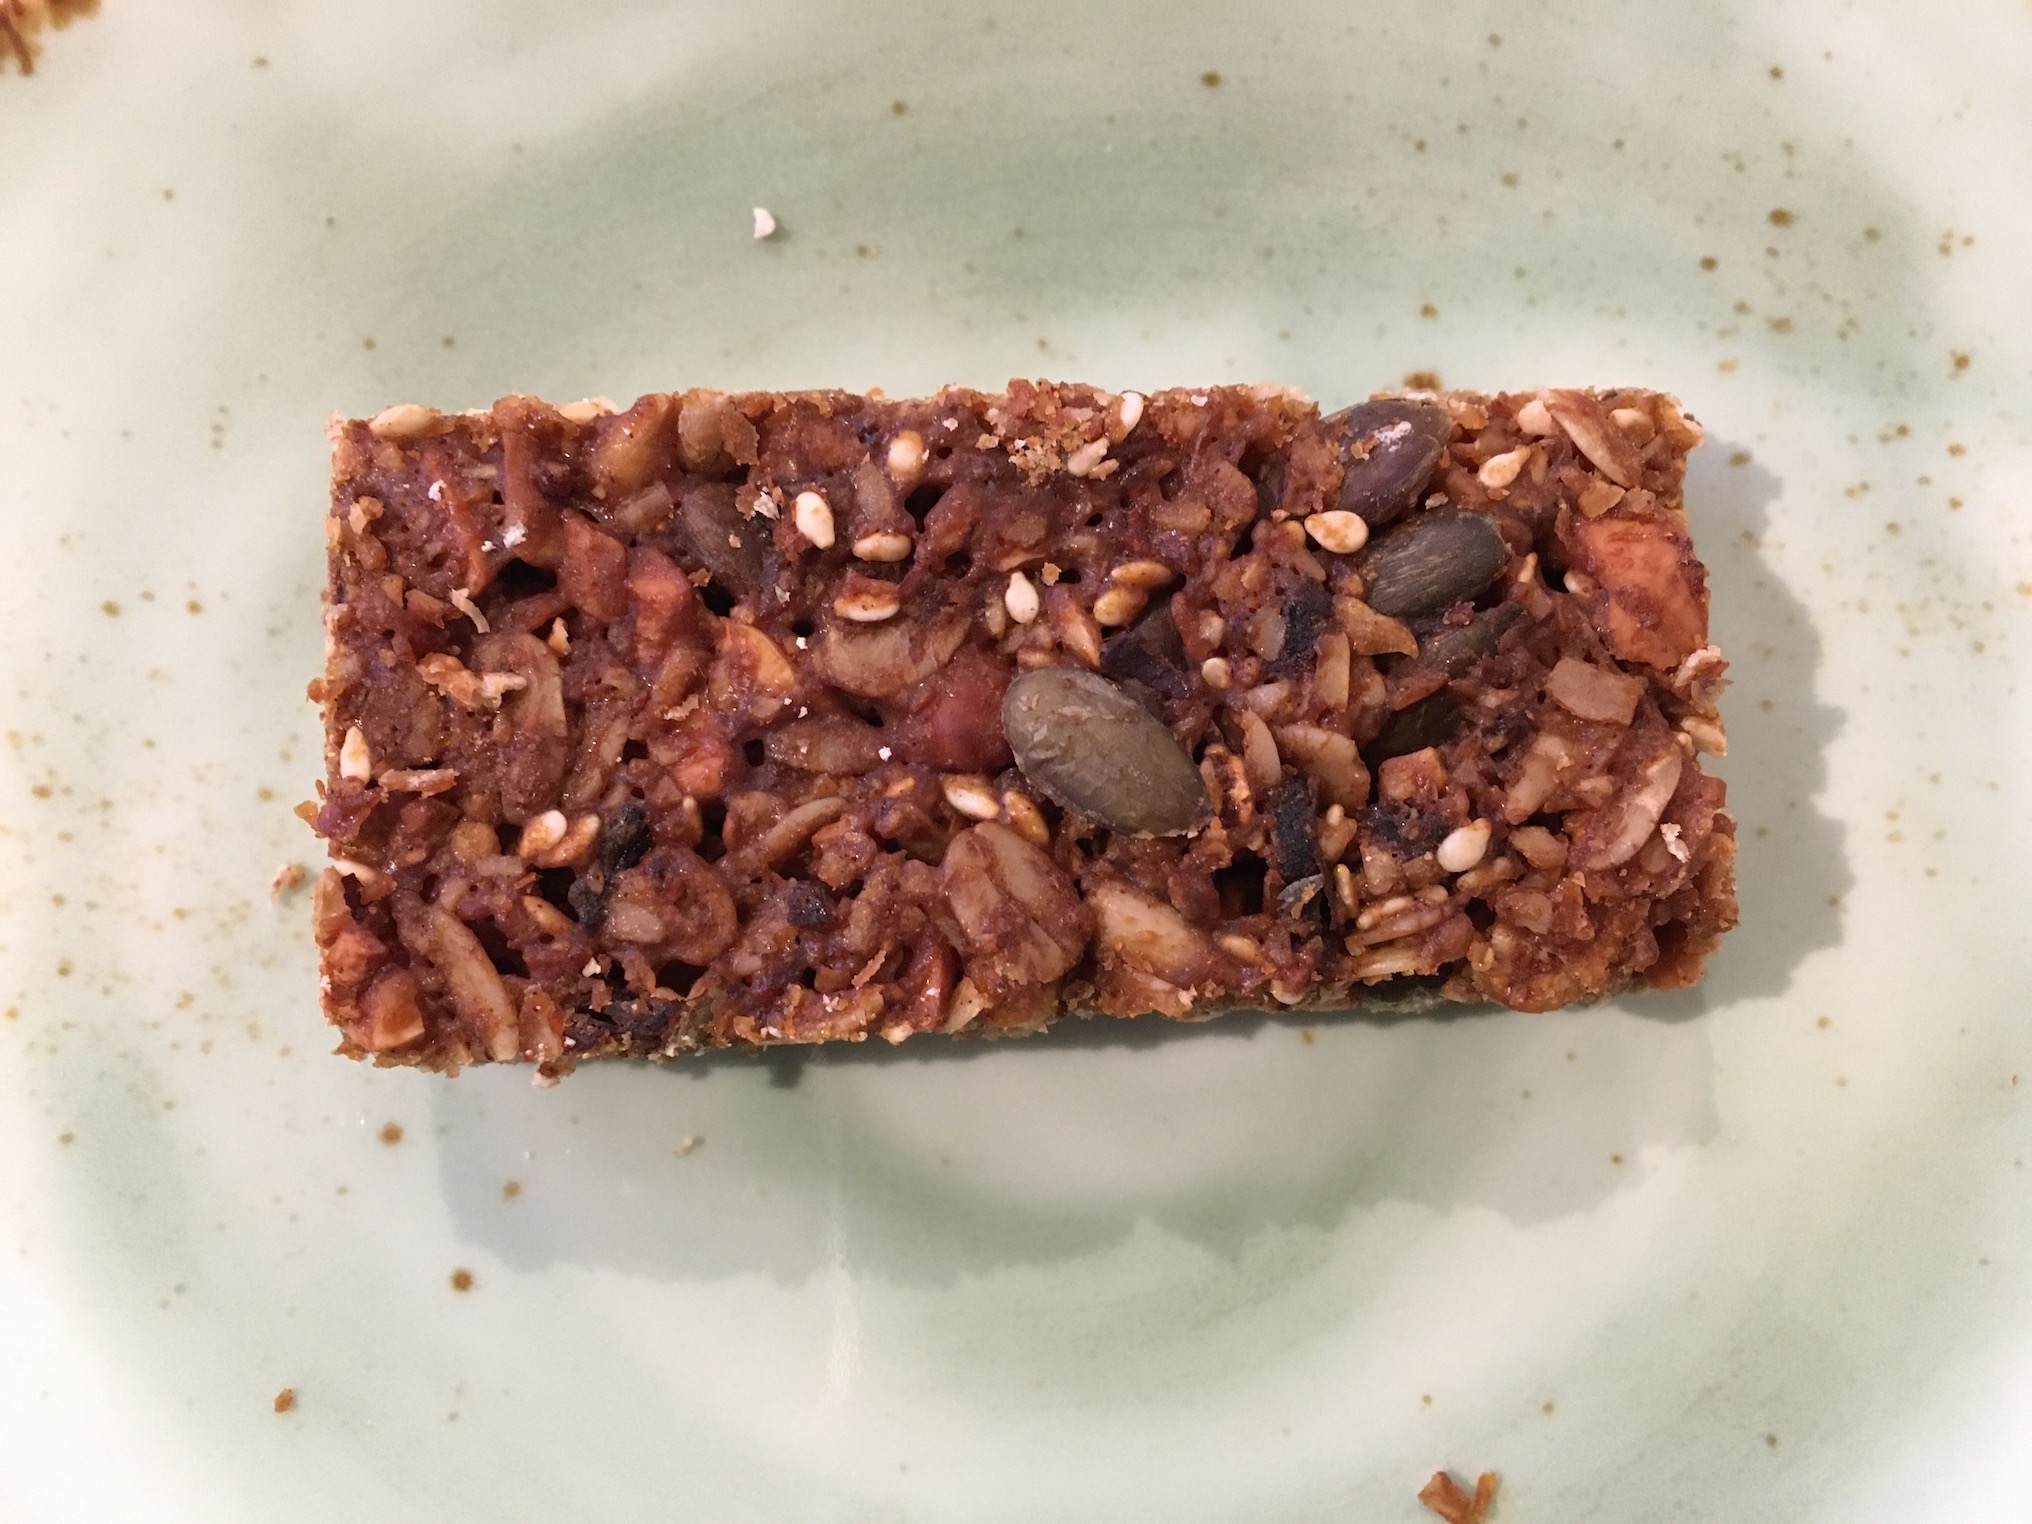
Starting with a recipe that was supposed to be a soft bar, I did a fair bit of tweaking and have ended up with a beautifully crunchy and robust bar full of yummy oats, nuts and seeds. 

Give them a try, and let me know how they work for you!

50 g hazelnuts
50 g cashews, roughly chopped
200 g old fashioned rolled oats
40 g pumpkin seeds
40 g sunflower seeds
15 g sesame seeds
50 g dates, chopped
100 g butter
100 g brown sugar
75 g golden syrup
grated zest of 1 orange
1 tsp cinnamon
1/4 tsp salt

Preheat the oven to 180ºC. Grease a 23 x 33 cm baking pan and line with baking paper.

Spread cashews, pumpkin seeds, sunflower seeds, and sesame seeds in a shallow baking tray. Place hazelnuts in a separate tray. Toast both in the oven for about 10 minutes until the nuts are lightly browned. Rub the skins off the hazelnuts and roughly chop. Transfer all the nuts and seeds to a bowl.

While the nuts are toasting, grind 80 g of the oats in a food processor until they become a coarse meal. Add all the oats to the nut mixture and stir to combine.

Place the butter, golden syrup, sugar and orange zest into a small saucepan and stir gently over medium heat until the butter is melted. Stir in the cinnamon and salt, and then pour over the nut mixture. Mix well, and then press evenly into the prepared baking tray.

Bake about 35 minutes, until the bars are a dark golden colour. Allow to cool for about 20 minutes, and then cut into bars while still slightly warm. Allow to cool completely before removing them from the pan.

* I used golden syrup in this recipe because I had some left over from another recipe that called for it. Next time, I’ll try it with honey, because I rarely have golden syrup on hand, and honey tastes better.

Beautiful Gingerbread

Sometimes you just have to take the time to make something beautiful, even if it is destined to be chewed up and swallowed.

fancy gingerbread cookies

I made gingerbread cookies out of Yotam Ottolenghi’s book Sweet last week. The gingerbread itself is nothing out of the ordinary, but the recipe calls for stamping the cookies and topping them with a boozy glaze.

I have a couple of wooden pasta stamps that were perfect for the job. The resulting cookies, brushed with a brandy-laced glaze, were as lovely as they tasted. The extra work was minimal, and the final product looks far fancier than it deserves to. 

In fact, I like the technique, and am thinking it would make pretty speculaas, too. I might even try an extra-fancy batch of homemade Oreos, stamped and glazed before sandwiching.

And of course, because I easily go overboard in my excitement, I’m also now wondering if I could carve my own little cookie stamps. Maybe bees or dragonflies, or a little dragon to go along with my books …

Flour tortillas–old dog, new tricks

A week or so ago, I ran across an article somewhere on the internet extolling the virtues of using boiling water in breads and pastries. I was curious, and a bit dubious (particularly in regards to the pastry) but they mentioned that in Mexico, flour tortillas are made with boiling water.

Hm. I’ve been making flour tortillas regularly for two decades. It never occurred to me to use boiling water.

So yesterday evening I gave it a go. Using my own tortilla recipe (see below), I simply replaced the water with boiling water.

As the article mentioned, the flour absorbed the boiling water much more quickly than cold water. The texture of the dough was more dry and crumbly than usual, and at first I was worried it wouldn’t roll out well.

But I was able to work each ball of dough into smoothness, and the rolling out went like a dream—I was able to roll the tortillas thinner, with little sticking or ripping.

They cooked as usual, and then came the real test—eating.

The finished tortillas were pliable and strong, and the flavour was definitely superior to the cold-water version—less floury, more cooked.

And just like that, my tortilla recipe changed… Who says you can’t teach an old dog new tricks?

Go ahead and try it for yourself.

1 cup all-purpose flour
1 cup wholemeal flour
1 cup cornmeal
3/4 tsp salt
2 tbs olive oil
1 1/2 cups boiling water

Heat a large heavy cast-iron skillet on high.

Whisk together the flours, cornmeal and salt in a bowl. Drizzle in the olive oil and mix. Add the water and stir until evenly moistened. Lightly knead until the dough comes together in a ball. Pinch off small balls of dough (about 5 cm (2-in) in diameter). Knead each ball lightly, then roll out on a generously floured board until they’re 1-2 mm (1/16-inch) thick. 

Lay the tortillas, one at a time, onto the preheated skillet. Flip after a minute or two—when the tortilla begins to bubble and the bottom is spotted with brown. Cook a scant minute on the second side, then stack inside a folded tea towel. Flip the whole stack over before serving (this helps equalise the moisture levels in the tortillas so the bottom ones aren’t too soggy, and the top ones aren’t too dry).

Gevulde Speculaas

I recently purchased the book Sweet, by Yotam Ottolenghi and Helen Goh (because the book was always checked out of our local library when I went for it). Like Ottolenghi’s other cookbooks, Sweet is a celebration of flavours, and unapologetic about excess.

My first foray into making some of the glorious recipes in the book was gevulde speculaas—stuffed speculaas.

Speculaas is a staple cookie in my household—richly spiced, quick to make, and delicious any time of year. Ottolenghi’s gevulde speculaas recipe, however, is speculaas for special occasions.

His spice mix includes cinnamon, aniseed, white pepper, ginger, coriander, cardamom, nutmeg and cloves. These are incorporated into a soft dough that is wrapped around an almond paste filling flavoured with lemon and candied citrus peel.

The cookies are baked as a log and cut into slices when cool. Each bite is a spectacular flavour explosion. Unlike traditional crisp speculaas, these stuffed speculaas are soft and moist. They’re the perfect accompaniment to a cup of coffee or tea, and look amazing too.

They are a lot of work to mix up, but they partly make up for it by being baked as a log, so there’s no individual cutting or shaping of cookies to do. They’re definitely celebration cookies, not everyday ones, but I’m certain I’ll be pulling the recipe out again.

Crazy Cake Season 2021: Cake #3

After my daughter’s octopus cake, the remainder of Crazy Cake Season has been less than crazy. My son’s cake was a bit of a do-it-yourself kit, and consisted of plain cupcakes and a tub of frosting posted to him, since he was back at university for his birthday. 

Cake number three, for my husband, was a small affair, since it’s only the two of us at home now. I don’t think I’ve ever made a cake this small—it seemed hardly worth the effort when I pulled the single 18 cm round out of the oven. 

He had asked for ‘fruity chocolate’ cake this year. So I made a chocolate madeira cake, filled with lemon curd and a lovely whipped cream and yogurt filling. I topped it with chocolate ganache, more whipped cream and yogurt filling, and fresh strawberries.

The cake was a new recipe for me, inspired by a slice of commercial cake I ate at a dinner party a few weeks ago. The commercial cake was delicious, with an intriguing texture—quite different from the usual bland froth of commercial cakes. A little research on the bakery’s website revealed it to be madeira cake, so I’ve set myself a goal to try making madeira cakes. My first try was a bit dry—something to work on—but with the fillings and fruit, the total package was delicious. 

I was particularly taken with the whipped cream filling, which came from CookingLight, and was easy to make:

1/2 cup cream
1/3 cup icing sugar
1/2 cup plain Greek yogurt
1/4 tsp vanilla (I increased this to 1/2 tsp)

Whip the cream and sugar together until stiff peaks form. Add the yogurt and vanilla and beat until smooth.

I had extra strawberries and was munching on them as I assembled the cake. In the process I discovered that the filling makes an amazing fruit dip. Worth making some extra, just for dipping strawberries into.

Inspirational Flavours

I was surfing the internet last week for something different to do with lentils and found a recipe for an intriguing lentil stew topped with roast broccolini and lemon on Bon Apetit’s website (Marinated Lentils with Lemony Broccolini and Feta).

I didn’t have broccolini, but I did have an overabundance of zucchini (surprise, surprise … It’s January; of course I have too many zucchini).

I was intrigued by the idea of roasting lemon, so I substituted zucchini and spring onions for the broccolini in the recipe, vaguely took inspiration from the herbs and spices in the lentils, and ran with it.

The result was delicious and refreshingly different from my normal lentils. The roast lemon was good—sour, bitter, and slightly caramelised. It enhanced the lightness of the vegetables and was quite pretty, too. And the spicy, tangy lentils were a nice complement to the vegetables. I can envision the dish working well with many different vegetables—eggplant, green beans, even beetroot—a great way to highlight an individual vegetable against the richness of lentils.

It’s gotten me thinking about other places I might include roast lemon slices—in mixed roast vegetables over couscous, in a lemon/butter sauce over pumpkin ravioli, floating atop a bowl of vegetable soup … there are lots of intriguing options. I love when a recipe inspires new ways to prepare old ingredients.

Ugliest Cake Ever

Yesterday was a bad baking day, for sure. In the afternoon, I tried to make meringue with aquafaba, which we’ve done before with great success. Not so on this attempt. After nearly 40 minutes of beating, my meringue mixture was still nowhere close to being stiff enough. I tipped it into the compost pile.

Later, I made chocolate cupcakes using a tried-and-true recipe. What could go wrong? First, I was out of cupcake papers. No problem—I greased and floured two cake tins instead. The layers looked gorgeous coming out of the oven.

But fifteen minutes later when I tipped them out of their pans, they stuck. By the time I got them out, one layer had the entire bottom ripped off, and the other was in a dozen chunks. 

I should have broken up the rest of the cake and made a trifle out of it—it would have been an excellent trifle! But the whole inspiration for making cake was to make frosting for it from a half-block of cream cheese that had been sitting in the fridge for ages unused.

So I glued the layers together with generous slatherings of tart apricot jam from last year’s bumper apricot harvest, then topped it with my cream cheese frosting, which wasn’t enough to cover a whole cake, of course, since I only had half a block of cream cheese (would have been plenty for cupcakes…).

The result was …

“A remarkable recovery,” in my daughter’s words.

And I suppose it was, considering the crumbled mess I started with. Still, this is a cake to eat quickly and with closed eyes.

It is delicious, though. Especially with all that apricot jam glue holding it together.

Navettes Sucrées—Sugar Shuttles

I tried a new cookie today–Navettes Sucrées–from The Gourmet Cookie Book. I’ve recommended this book before and it’s worth doing again—not only are the recipes great, but the interior book design is an absolute delight.

Sugar shuttles apparently appeared in Gourmet Magazine in 1951, but the recipe originated in France, and has clearly been around for a very long time. I’d wager the original makers of sugar shuttles would have been surprised to find them in a high-end cooking magazine.

The ingredients are simple, and most are the sort of things that would have been available to subsistence farmers in pre-industrial times—flour, butter, eggs. The scant sugar—once a luxury—is mostly on the outside of the cookie, making them seem sweeter than they really are. 

The method also speaks of antiquity. The ingredients are placed together in a bowl and kneaded by hand to create a dough. Only the refrigeration step in the modern recipe is out of place, and for this very stiff dough it’s hardly necessary.

And of course, the name refers to the shape of loom shuttles—no doubt a common object to homesteaders of the past.

The resulting cookie is as basic and satisfying as the recipe itself—simple flavours with a little sparkly bling from the sugar crust. One can imagine eating them in some remote cottage in the French Alps three hundred years ago.

Here’s the recipe:

1 cup all-purpose flour
1/4 cup sugar (+ extra for coating)
1/4 tsp salt
60 g (1/4 cup) soft butter
2 eggs, separated
1 tsp vanilla

Sift the flour, sugar and salt into a bowl. Add the butter, 2 egg yolks, and vanilla. Knead until the dough is well blended. Refrigerate 2 hours. Divide the dough into pieces the size of a small walnut and shape each piece into an oblong about 5 cm (2 in) long and 1 cm (1/2 inch) wide. Dip each in lightly beaten egg white and roll in granulated sugar. Bake on a buttered baking sheet at 175ºC (350ºF) for 8 minutes or until lightly browned. Remove immediately from the pans and cool on a rack. Makes 20.

Happiness is a Kitchen Full of Baked Goods

The weekend was crazy-busy with garden work. Saturday, I worked from 7 am to 6 pm weeding, mulching, digging post holes. Sunday’s schedule was similar, but I stopped around 3 pm because the final job on the list was planting out lettuce seedlings, and the weather (hot and with severe gales) was sure to kill them all. Besides, I could barely move—back, arms, hands and feet all hurt from the punishing work. All I wanted to do was collapse.

Except that I wanted to collapse with baked goods in hand.

So instead of sitting down, I baked. Apricot tart for dessert, and a double batch of Irish coffee crunchies (from The Gourmet Cookie Book) for lunches. Baking made me forget my tired body for a couple of hours. As I pulled the last of the cookies from the oven, I was on a roll. I started in on chopping vegetables for dinner. While dinner cooked I filled the cookies with icing and finished cleaning the kitchen, so that by the time dinner came out of the oven, the cookie jar was filled, the tart was waiting to be cut, and all the dishes were washed.

I could barely sit upright long enough to eat dinner.

But every time I’ve been in the kitchen since then, I’ve looked at those baked goods and smiled. Okay, and maybe I’ve snitched a cookie too, but don’t tell anyone. 

Happiness is definitely a full cookie jar.

Kitchen Disaster

A beautiful new kitchen is no proof against disasters.

Yesterday I baked a batch of chocolate cupcakes. I used a devils food cake recipe from Tartine. It’s an intensely decadent recipe that uses 1 1/4 cups of cocoa. The result is a dark, rich cake that could satisfy any chocolate craving.

The recipe makes two dozen cupcakes, and as I walked across the kitchen to put the trays into the oven, one of the trays slipped out of my hand. A dozen unbaked cupcakes flew through the air to splat on the floor and all down the kitchen table. 

I was so stunned, I didn’t even swear. Half my cupcakes had just been ruined, and there was cake batter splattered across the kitchen.

After a few moments I began to laugh. Then I took some photos before trying to salvage some of the batter and clean up the mess.

I managed to retrieve enough clean batter for six cupcakes, so all was not completely lost.

And I got a blog post out of it—always look for the silver lining …

And the cupcakes? Delicious!