I can’t really call cake season crazy anymore. There are no children at home demanding quirky cakes in the shape of peripatus, octopi, hobbit holes, or the city of Wellington (all cakes I have, in fact made).
But I can still pull out the stops on the birthday cakes, and to be fair, the ‘adult’ cakes taste better than the kid cakes.
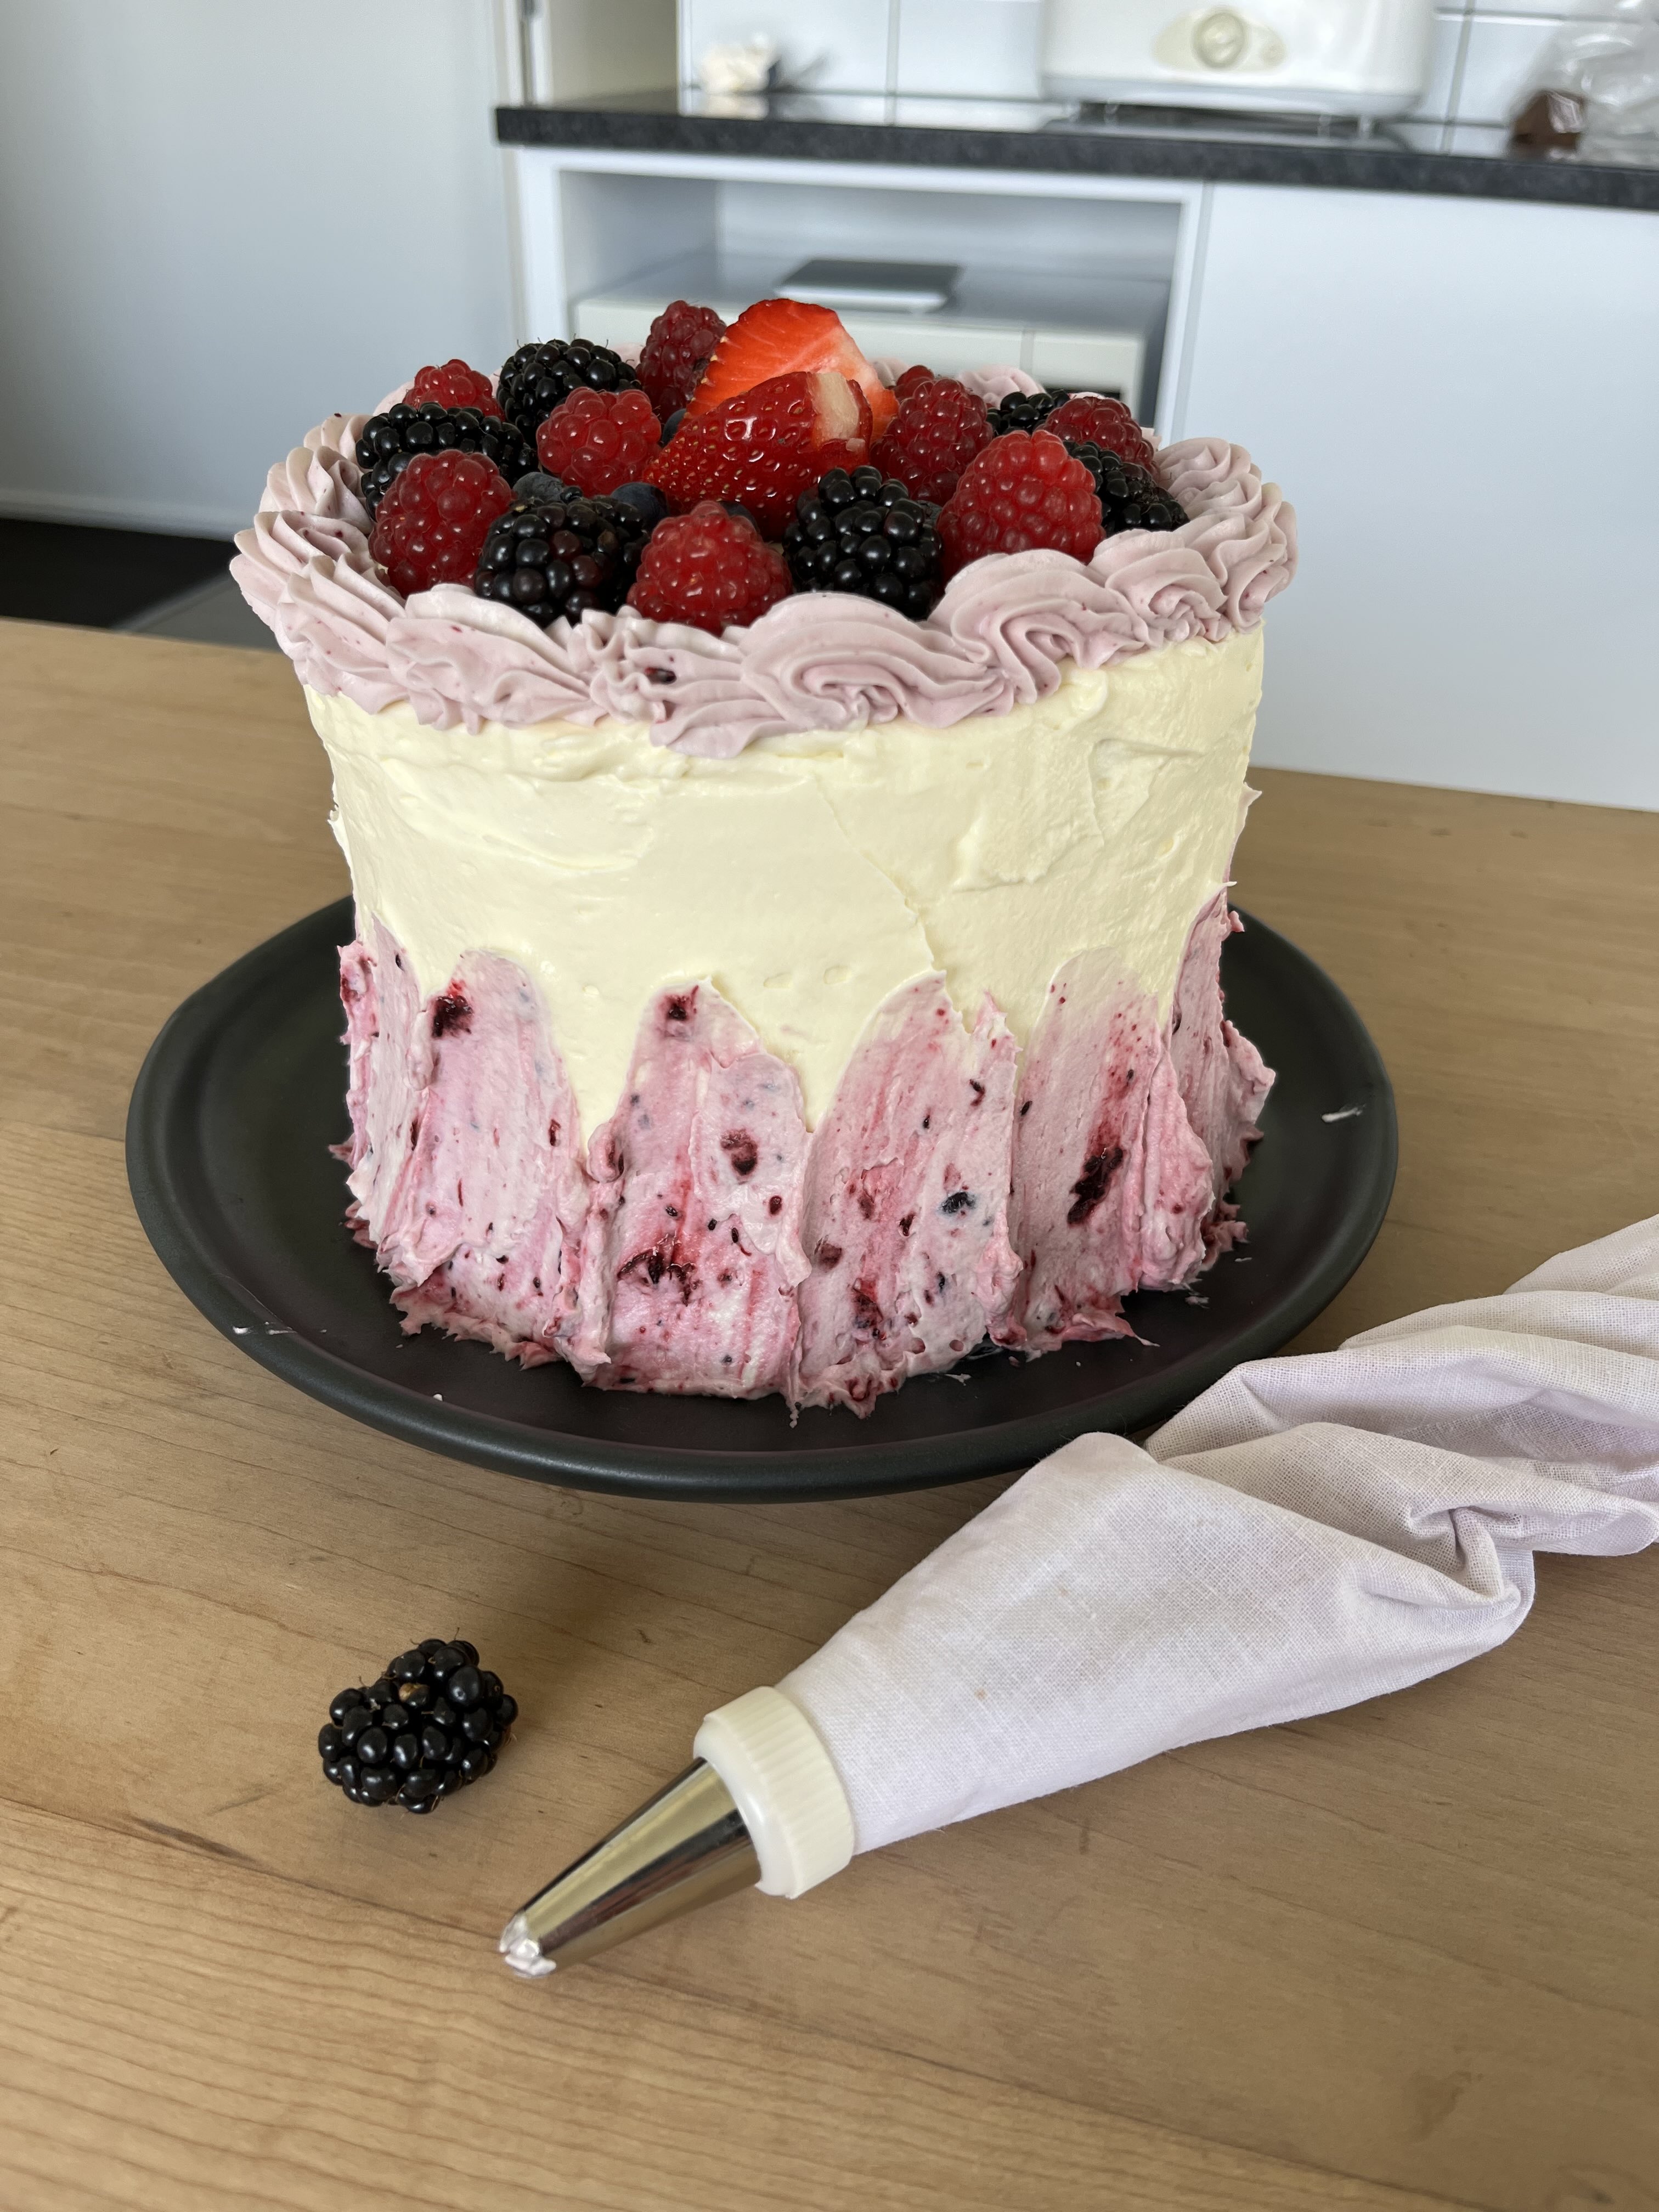
This year’s first birthday cake was a 4-layer lemon cake filled with a cornstarch-thickened blackcurrant jam and iced with mascarpone frosting. Fresh berries on top and a bit of blackcurrant-coloured frosting swiped on the sides of the cake were the only decorations.
For looks, I’d give it a 4. Pretty average, though it did look nice sliced on the plate. For flavour, it gets a 9—a good combination of tangy and sweet.
This was the first time I’ve worked with mascarpone, and I have to say I expected more from it. Nothing wrong with it—it was easy to work with and made for a very nice, fluffy, not too sweet frosting. But flavour-wise, I prefer the bolder cream cheese frostings.
But that’s okay. This cake, with its generous blackcurrant filling, is deliciously bold, and there is absolutely nothing wrong with the mascarpone icing.
If you want to make your own, I baked my lemon cake in three 15-cm cake tins (they took about 45 minutes to bake, as opposed to the 30 minutes in the recipe). After baking, I sliced two of the cakes in half horizontally into two layers each. The third cake I froze for later.)

The filling is the blackcurrant jam from my blackcurrant twists recipe—super simple and quick to make. I made it the day before and refrigerated it so it was nice and firm.
The mascarpone frosting recipe is from Of Batter and Dough—I used a full 500g package of mascarpone, eyeballed 400 ml of a 500 ml bottle of cream, and used the smaller quantity of sugar called for in the recipe.
For once, I also cut my layers flat, piped my icing on, and worked with a cold cake. This helped make the thickly-filled layers stack solidly.
And though I was a bit disappointed by the final look, the taste makes it definitely worth doing again.