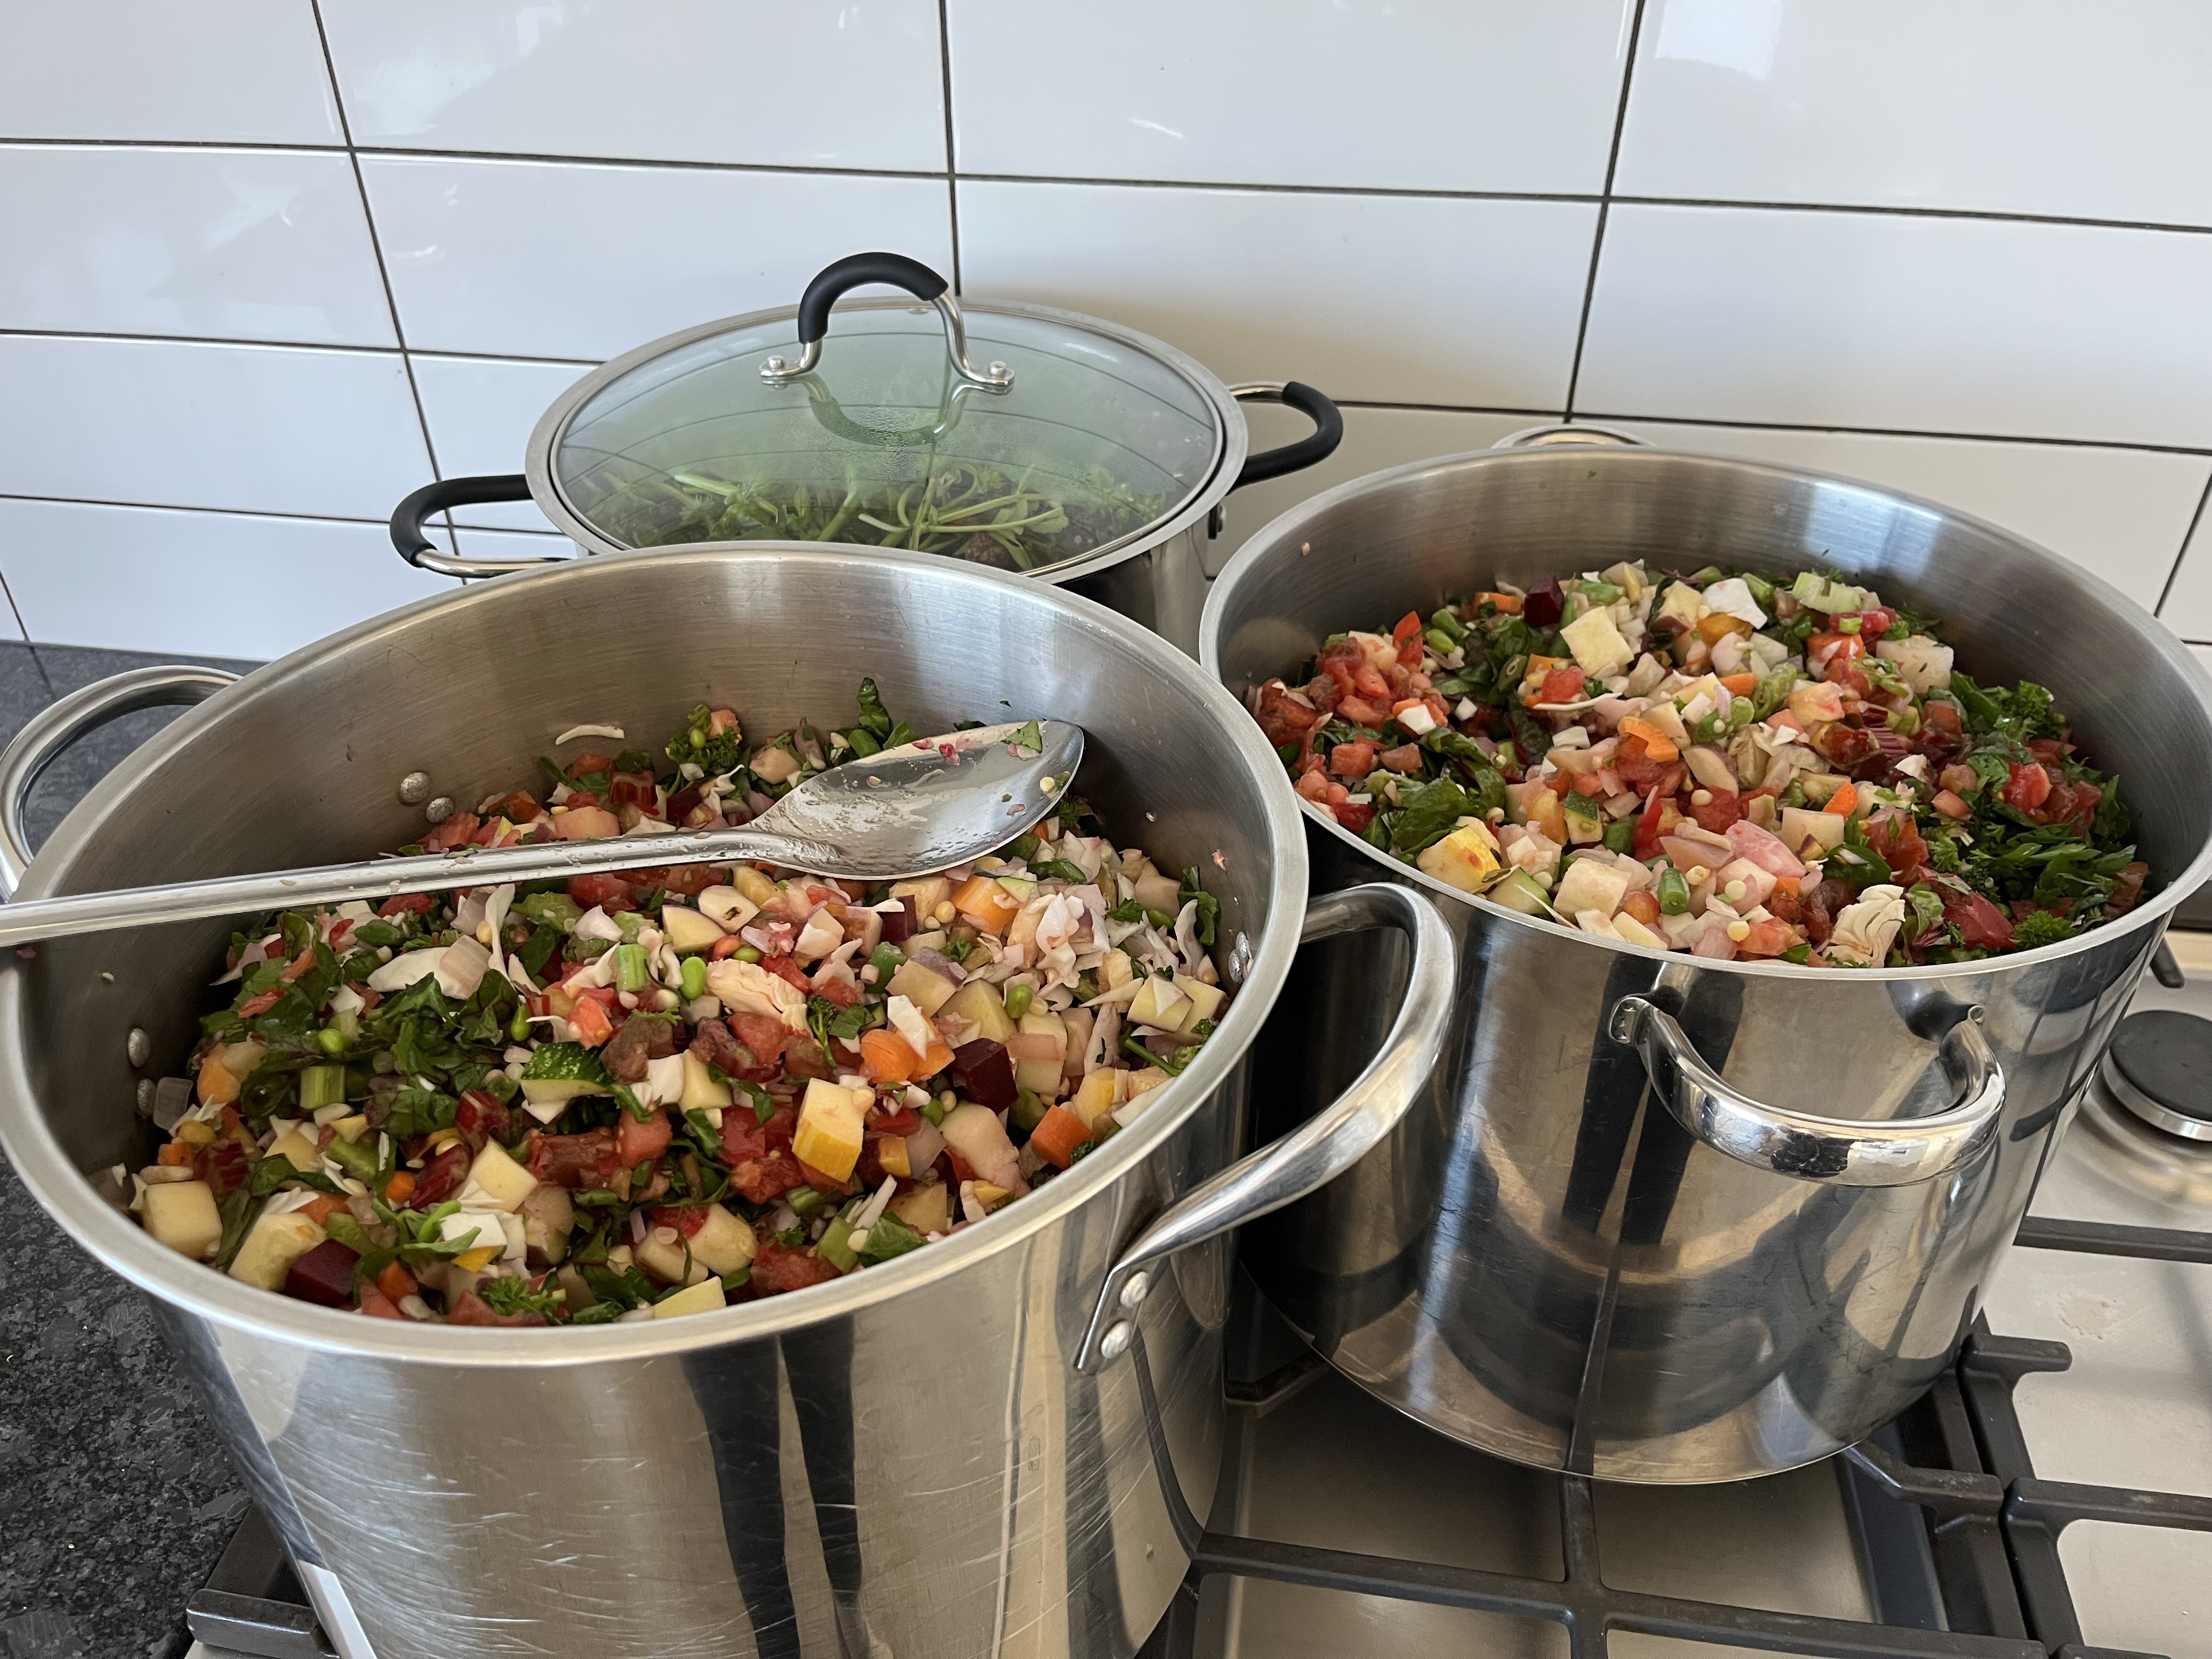
Last Saturday was Summer Soup Day—the day I make vegetable soup to last through the winter. As usual, I started just after breakfast, around 7 am. Picking and chopping vegetables, with my husband’s help, took until nearly lunchtime.
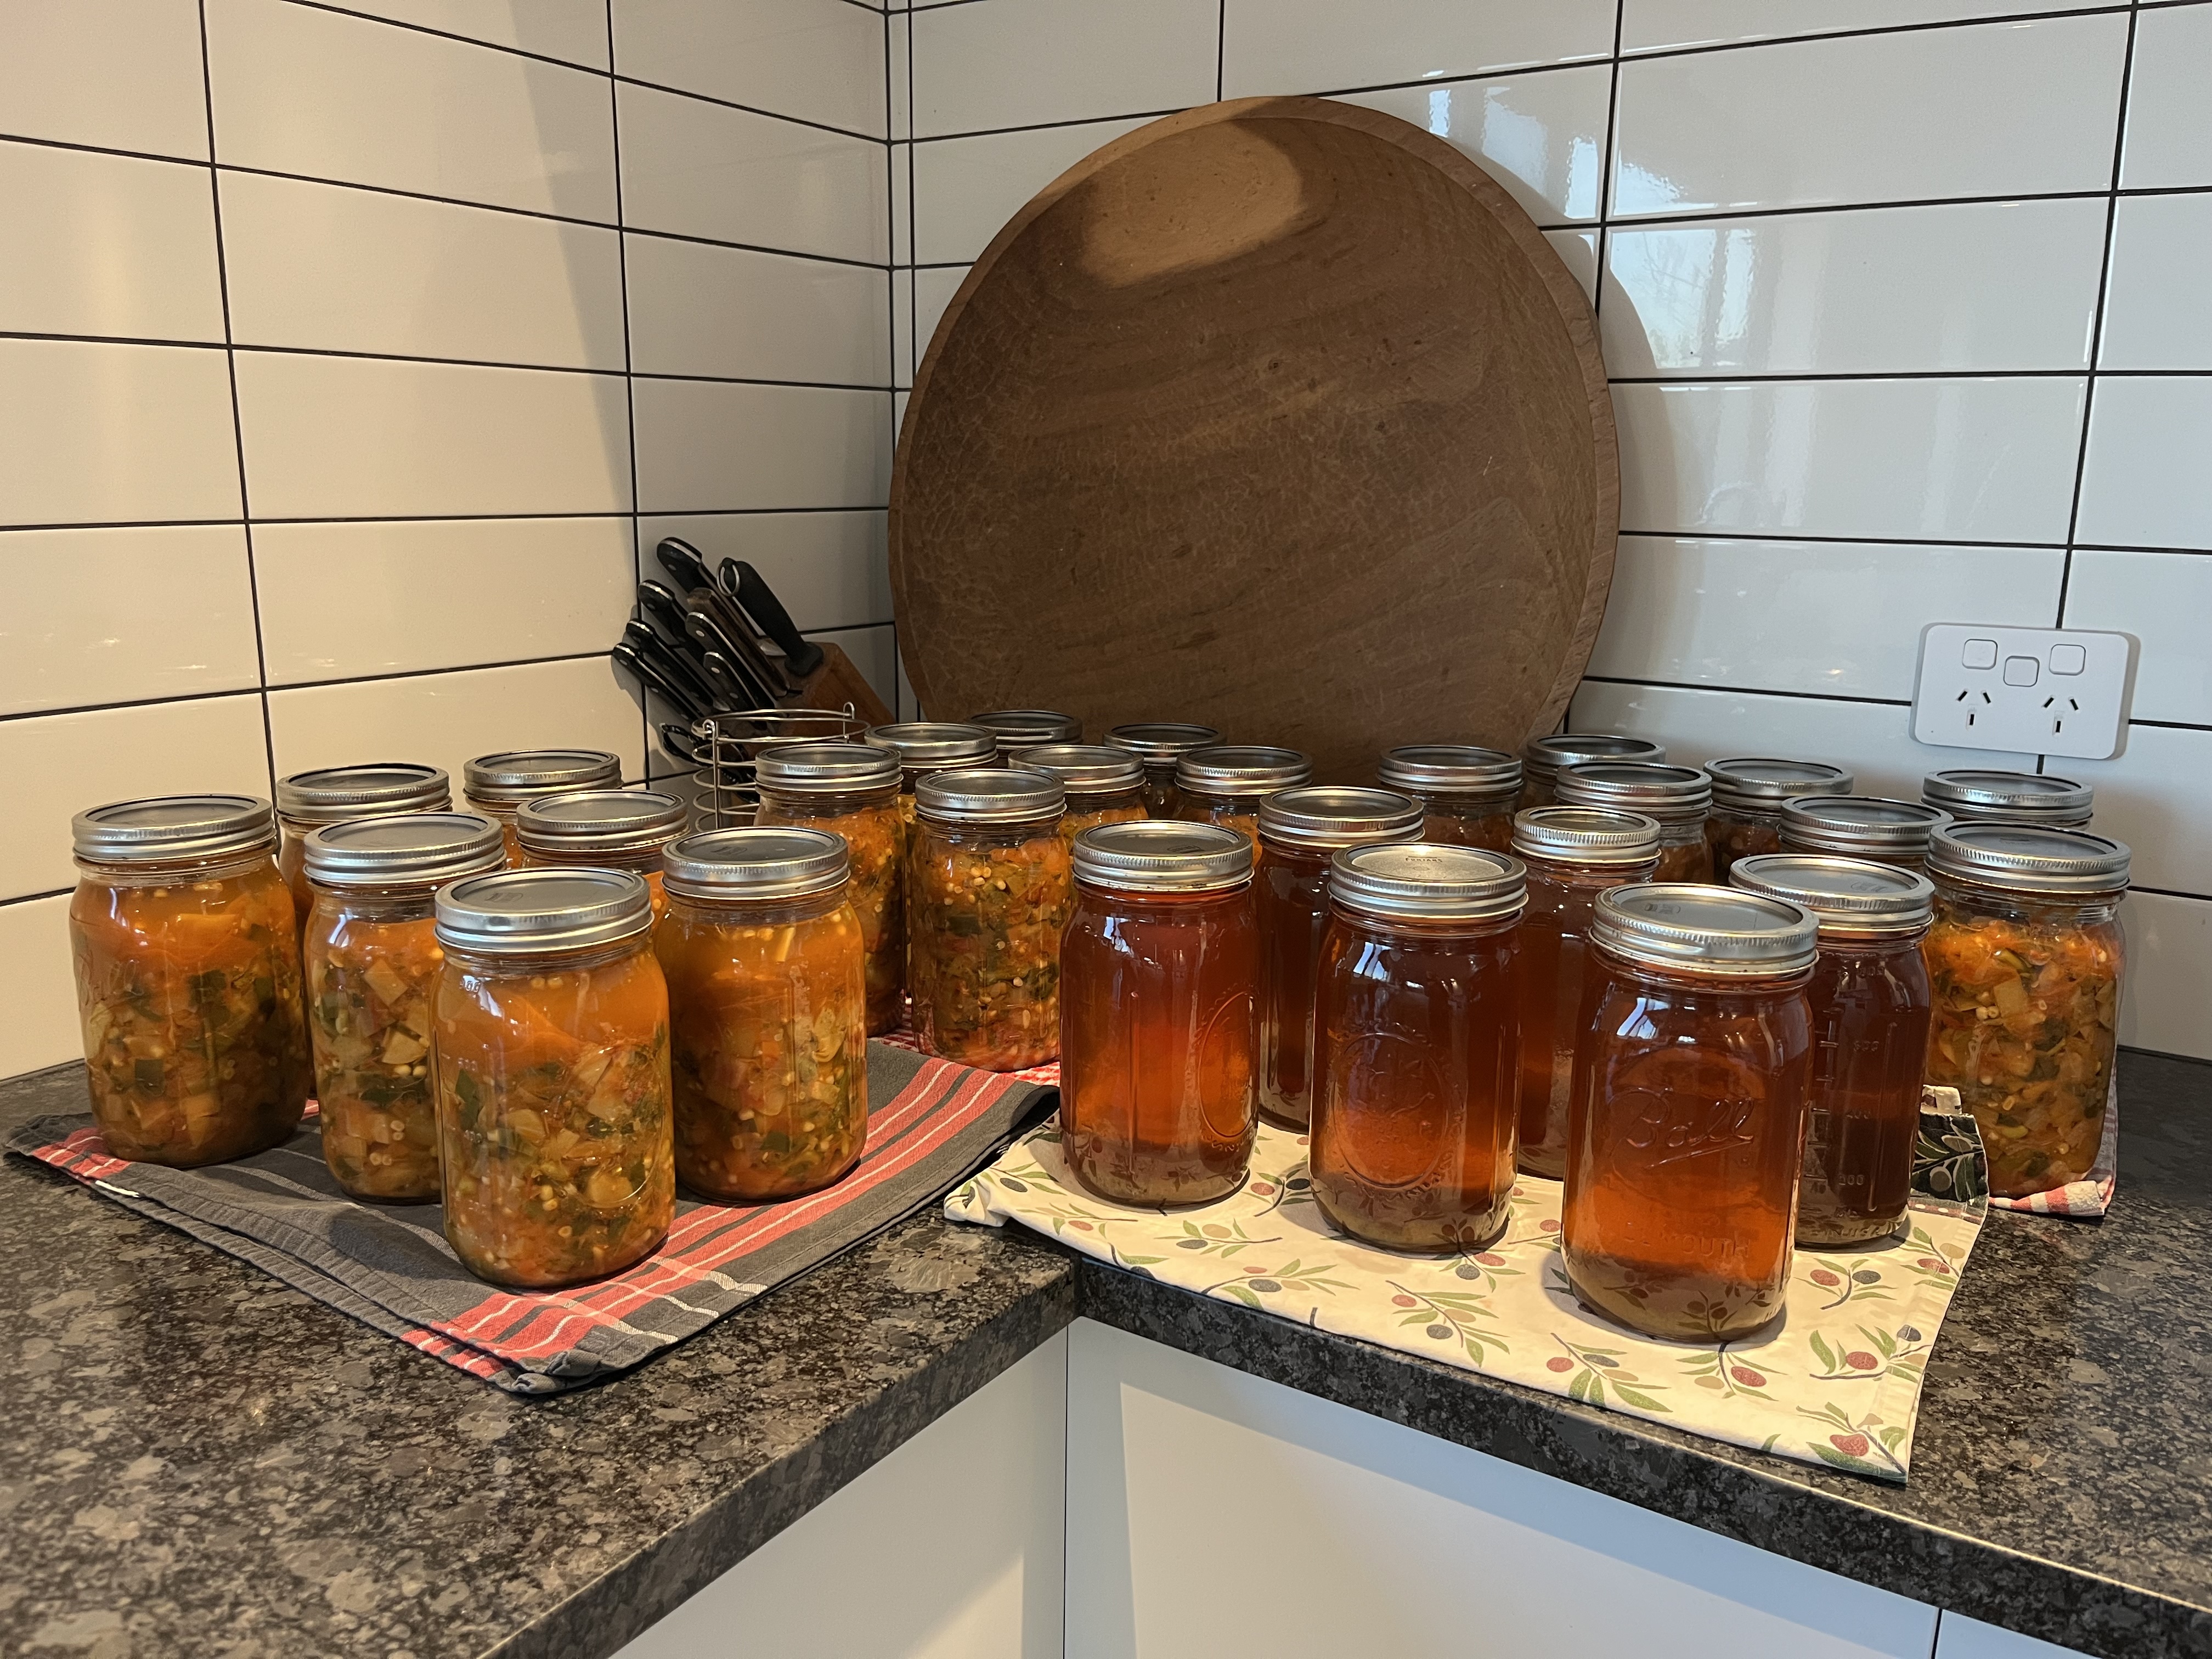
We filled both of our largest stock pots (16-litres and 18-litres) with soup, and our 12-litre pot full of vegetable offcuts for stock. Just getting all that soup to a boil took nearly an hour, and then it had to be processed in the canner. It was a long day in the kitchen.
A long time to contemplate soup.
We’ve been making summer soup for close to twenty years, now. Each year it is slightly different. Each year reflects the summer’s weather and our garden wins and fails for the year. It truly is an encapsulation of the summer.
This year, the summer soup was full of beautiful carrots—long and straight, including some fabulous purple carrots. The soup is a record of my successful raised carrot bed born of my frustration at previous carrot crop failures.
This year’s soup contains blazing hot jalapeño from a plant a friend gave me, because my jalapeño plants (a variety called Jalapeño Early, which is milder) were devoured by slugs as seedlings.
This year, the summer soup is devoid of sweet peppers, reflecting the cool, wet weather that has delayed ripening and rotted peppers on the plants.
This year’s soup is rich in green beans, which are often long over by the time I make soup. Planting only runner beans this year, instead of mostly dwarf varieties, gave me a longer season.
This year, there’s less sweet corn in the summer soup than usual, the result of abysmal germination in my first sweet corn planting.
Despite the cool, wet weather, germination woes, and devouring slugs which have affected this year’s soup, it is delicious, as it is every year. It is a slice of summer’s bounty, bottled up to remind us of sunshine and warmth on days when both are scarce.
The tally at the end of the day was 25 litres of soup, and 6 litres of vegetable stock (plus the two dozen cupcakes I made while waiting for the jars to run through the canner). I pulled the final jars out of the canner at 8 pm.
A long day, but worth every moment.