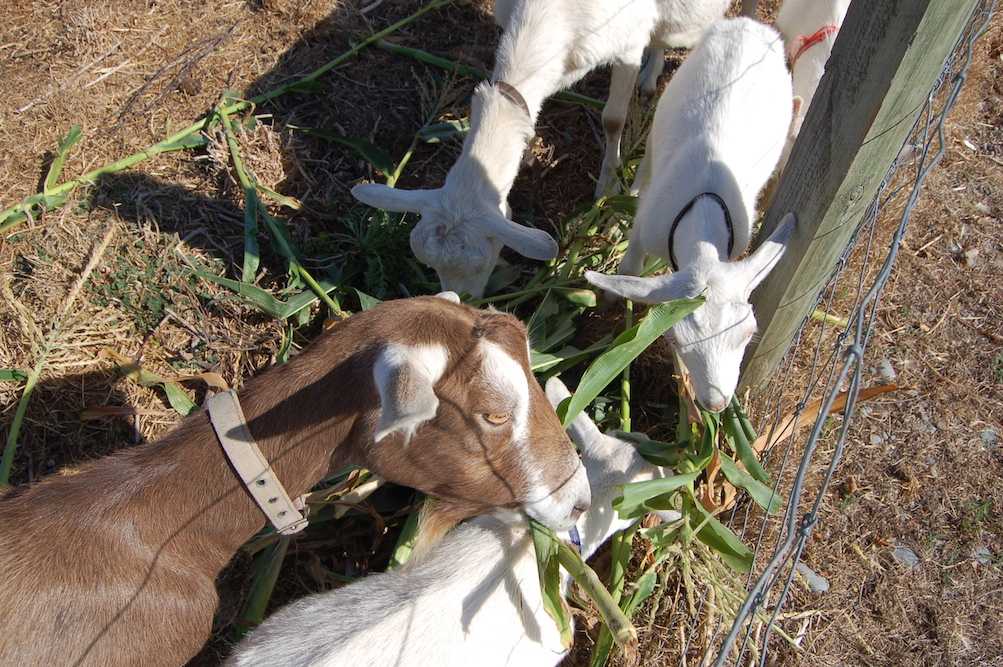
Caprine Composters at work on tough corn stalks.
There are dozens of ways to compost. There are barrels that rotate, rocket-shaped bins with handy doors on the bottom for extracting the finished compost, clever bokashi buckets, and worm bins. Then, of course, there are the non-commercial composting systems like sheet or pit composting, and my personal favourite, throw-it-in-a-pile-and-ignore-it composting.
None of these systems works well for large, woody items, though—small branches, corn stalks and the like. These things linger (or don’t even fit) in most composting systems.
For these woody items, I prefer the Caprine Composting System. This effective and efficient composter takes large woody plant material, and reduces it to convenient, pelletised fertiliser in just 24 hours. No tedious chopping and waiting on your part, just throw it over the fence, and the Caprine Composter does the rest!

Bonus! The Caprine Composter is adorable, too!
Comes in fashionable and discrete colours like white, brown and black. No assembly required.
Caution! The Caprine composter is highly efficient, and can compost valuable trees, shrubs, and other plants if not properly operated and restrained. Read all instructions before operation. Use with care!